
Elastic compute cloud
A EC2 – an elastic compute cloud – is just a simple virtual machine. Amazon does have a lot of really interesting ways of using virtual machines to solve problems. The first step is to create an EC2 instance. The steps to do this are as follows.
- Choose an AMI
- Choose an instance type
- Configure instance
- Add storage
- Add tags
- Configure Security group
- Review
- Generate key pair
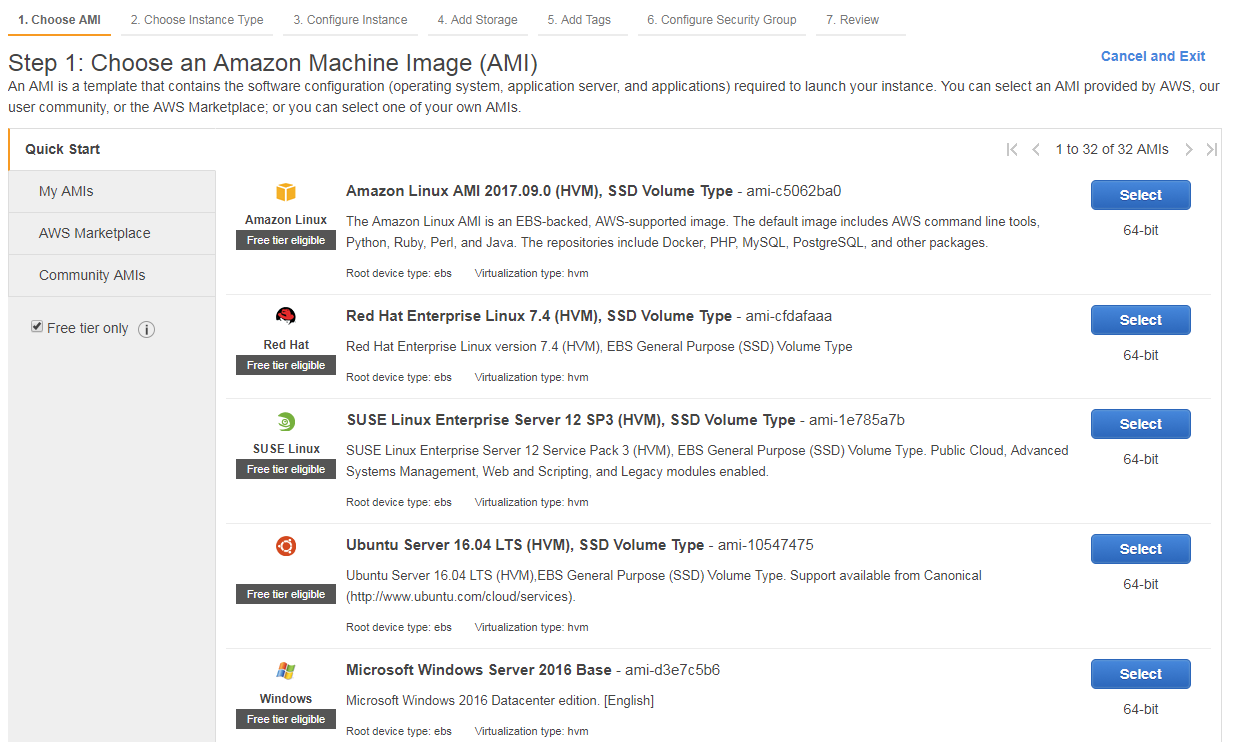
Choose an AMI
Amazon give the acronym AMI to represent all of the machine images that you can choose. Of course Amazon has their own Linux distribution but they also have a lot of other popular distributions available as well.
- Redhat
- SUSE
- Ubuntu
- Windows 2016 server
You can select whichever distribution you feel the most comfortable with.
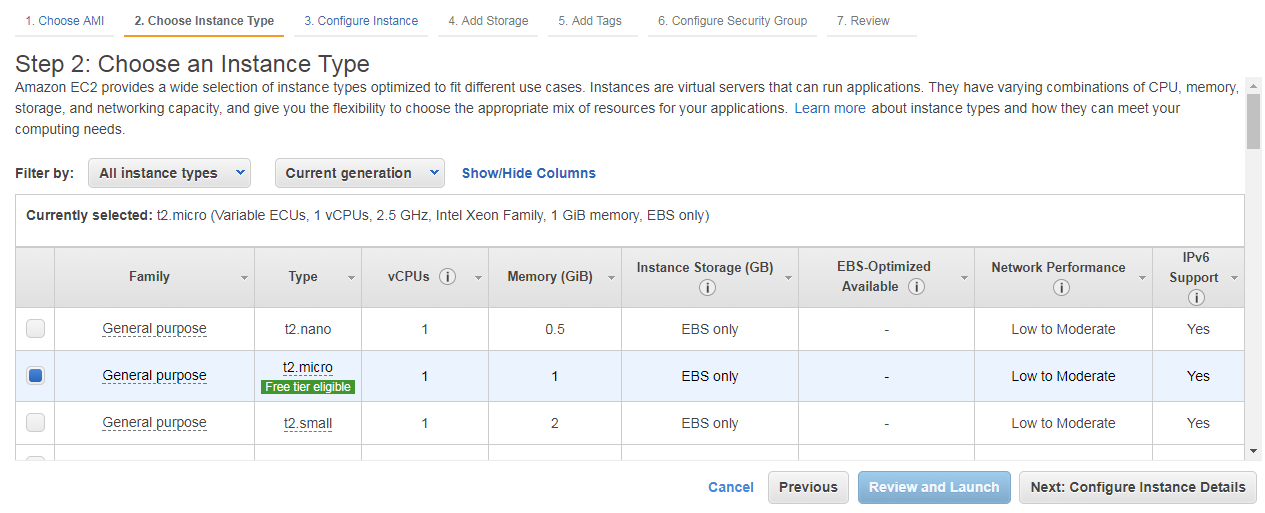
Choose an instance type
The next step is to select the resources that should be made available to the machine. The resources is all the same as for a physical computer. This is the number of cpu’s, or virtual cpu’s, the memory and disk space. I have chosen a small machine for testing.
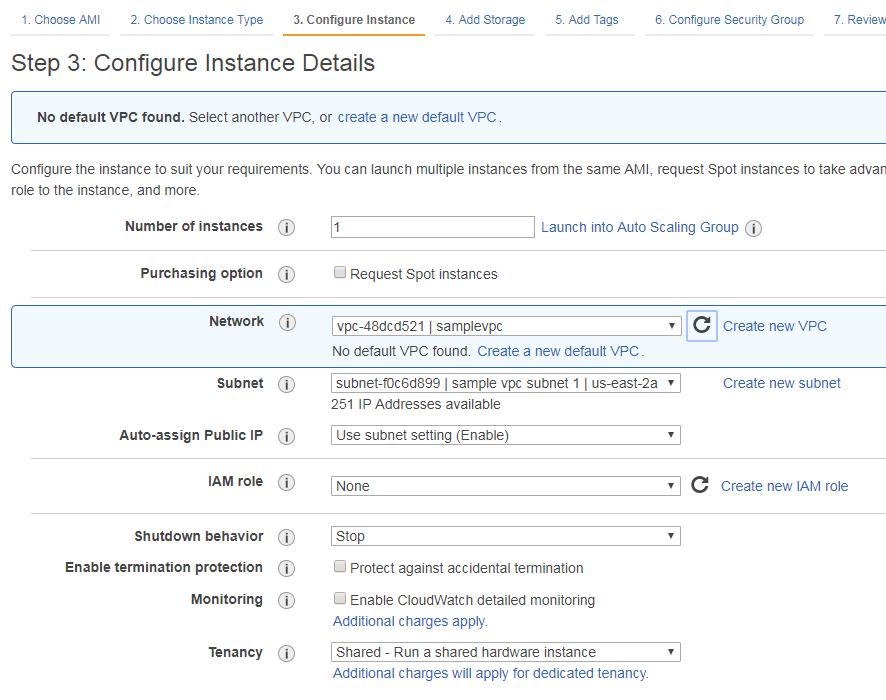
Configure instance
The next step is to select your vpc and which subnet (assuming more than one exists). Assuming you correctly did all of your steps correctly in creating it your virtual machine will get a public IP.
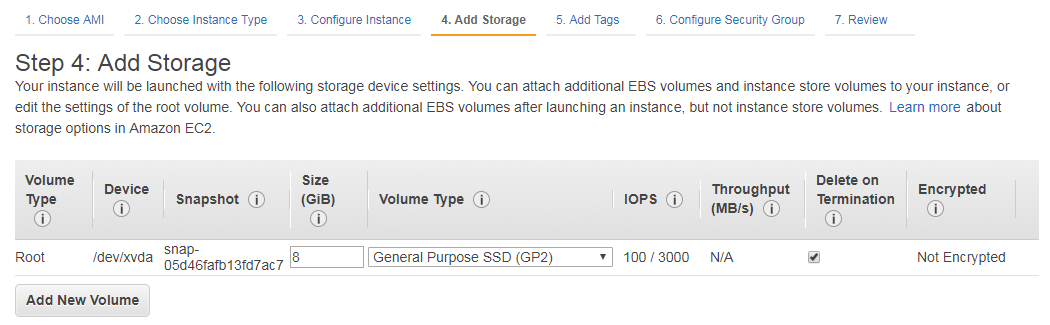
Add storage
Your EC2 will already have a drive assigned to it. This is also were you could add additional volumes. I haven’t actually needed any permanent storage for my tests so I left the default for this, however, in the future I will write up an example adding additional storage.
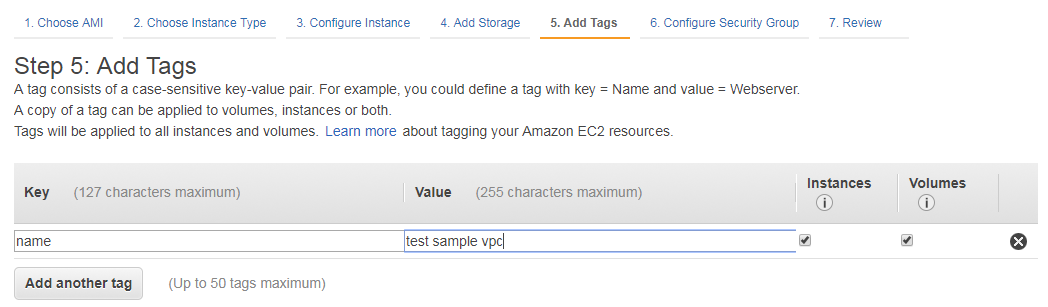
Add tags
This is a totally optional step. You can create a number of tags that will be displayed with your machine. I believe that these tags will also be on your billing statement.
Configure Security group
At this point it is either possible to create a new security group or select the one that was created while creating your VPC.

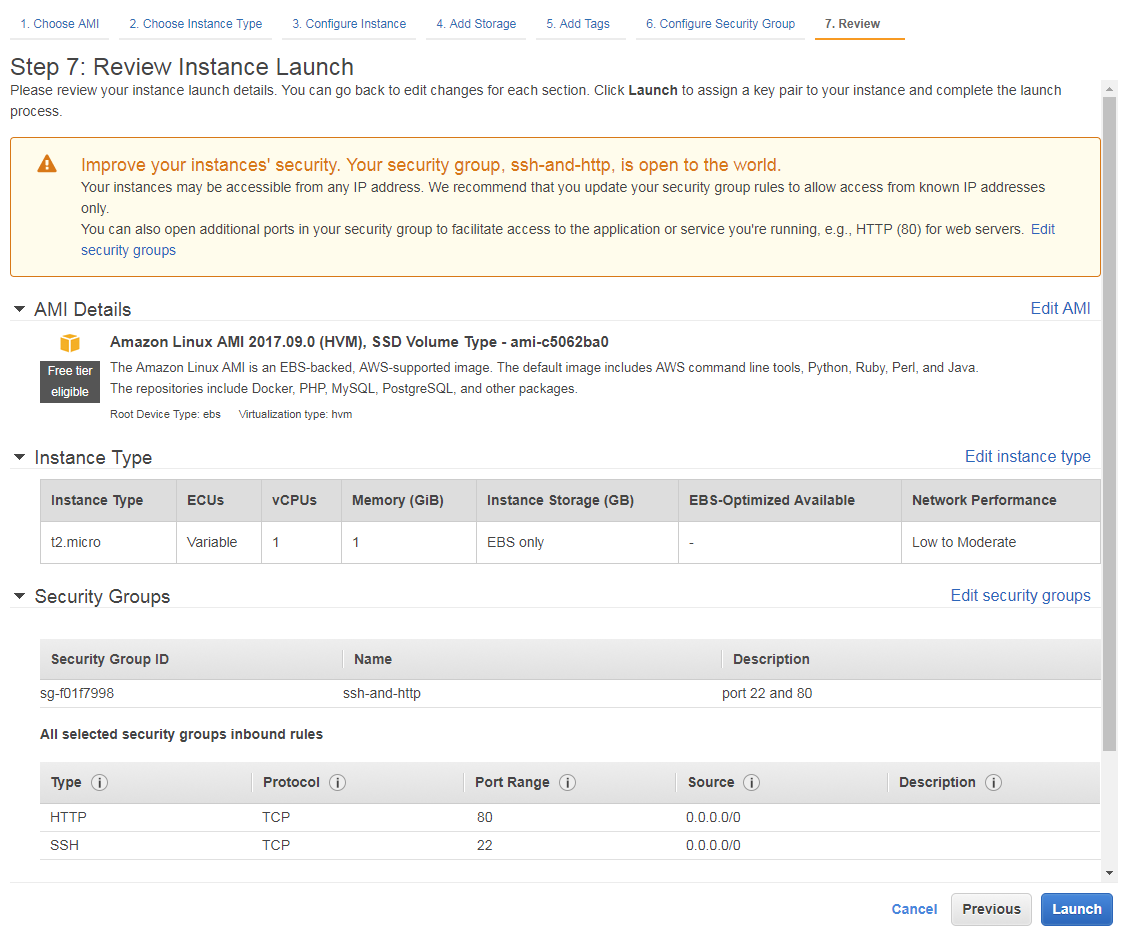
Review
With these few steps done Amazon gives you a chance to review all of your settings before actually committing to this EC2 instance.
Generate key pair
Oddly enough I would have thought that this step would have been before the review. The only way to connect to your machine is with a public / private key pair.
This will be the only opportunity to download the key pair so you should save it in a good location. While creating other EC2 instances it is possible to either create another new pair or use an existing key pair.
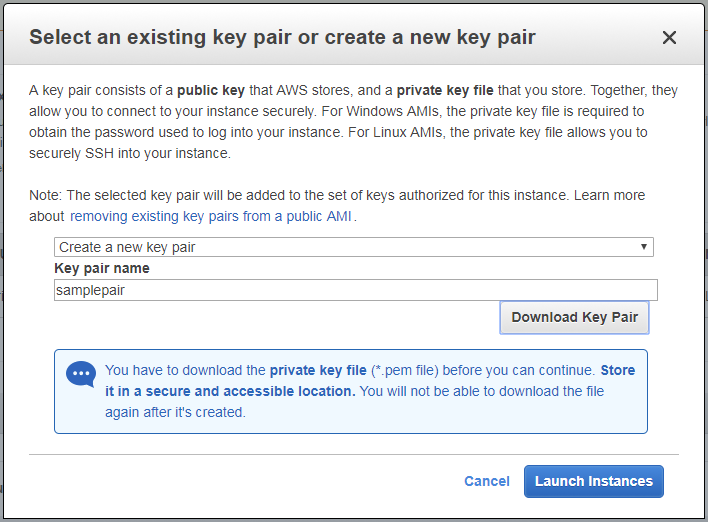
At this point when you press the “Launch Instances” button the EC2 instance is created.
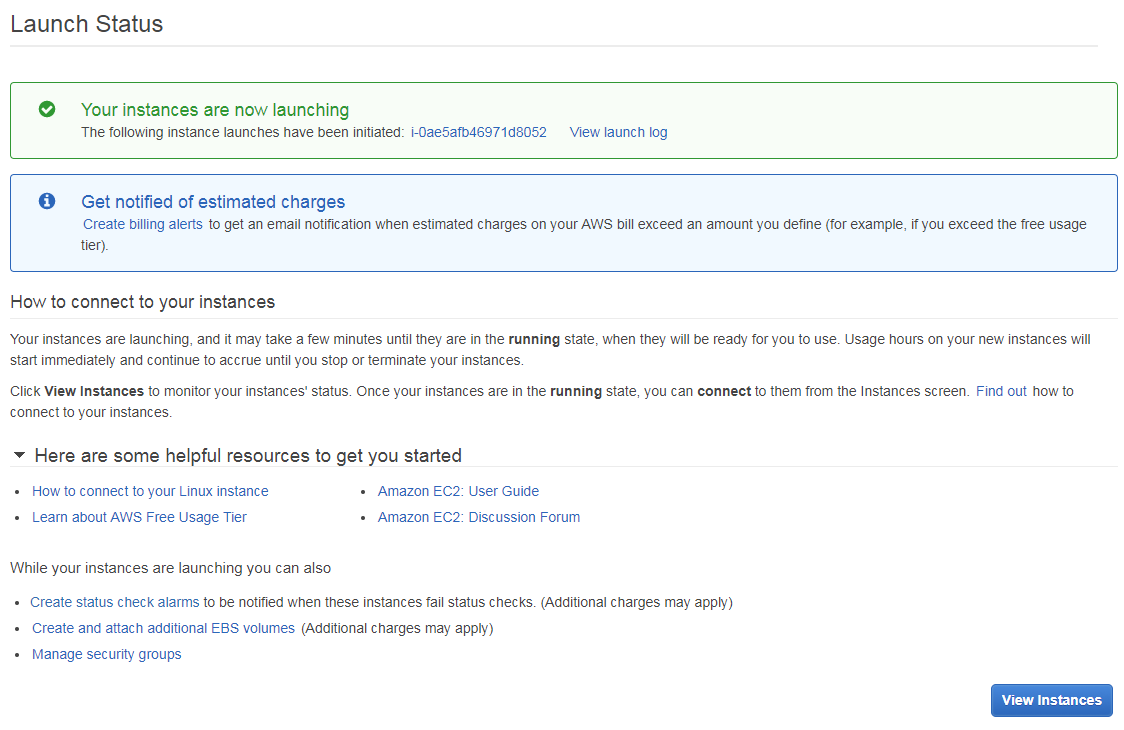
Pressing the instances button will bring up the dashboard.
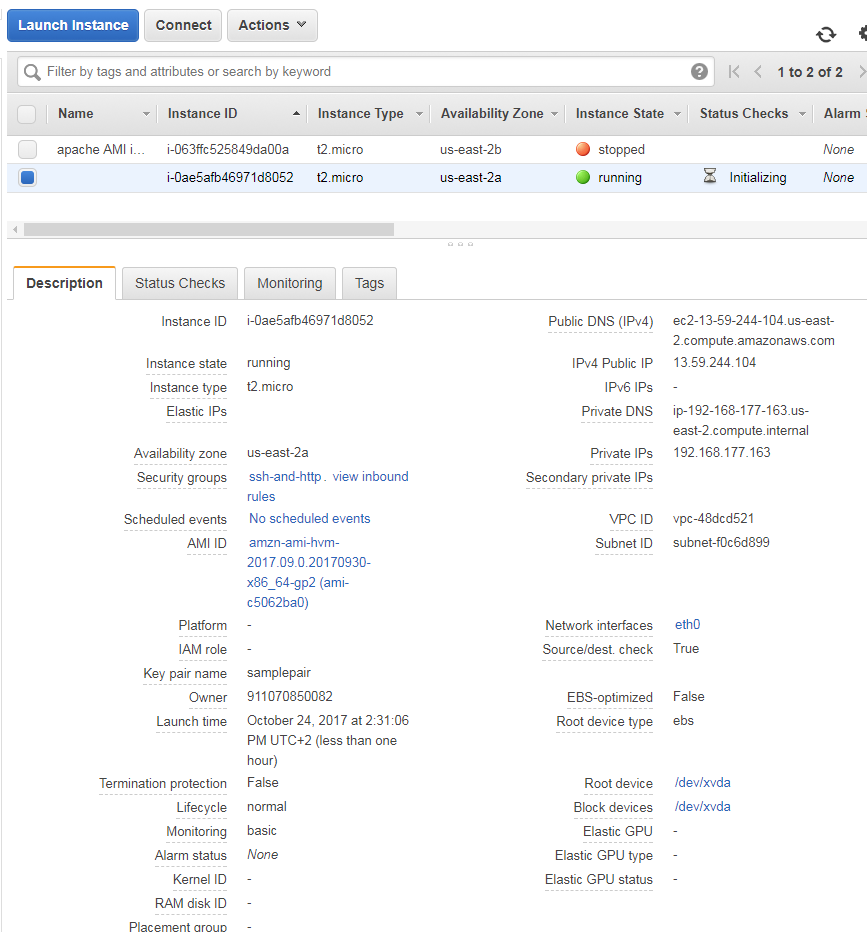
Dashboard
The dashboard will show all of the running, stopped or terminated instances. The terminated instances will be displayed for a short period of time and then eventually will be removed.
Summary
Once your instance shows up on the dashboard as running you can then connect to it. Simply ssh to your virtual machine using your private key. In this example the machine name is rather a mouthful.
ec2-13-59-244-104-us-east-2.compute.amazonaws.com
However, Amazon does make it easy to connect to your machine, well, if you happen to be using linux or unix. Simply select your machine and choose “connect” from the actions button at the top of the screen. This will bring up a dialog showing the actual command that you need to use to connect to the machine.
ssh -i "apacheAMI.pem" root@ec2-13-59-244-104-us-east-2.compute.amazonaws.com
If you are not actually using some flavor of unix you will need to do a few other small changes in order to connect to your machine, but Amazon is good enough to have a web page that documents this process.
