Got a new tablet for the price of fastfood meal …

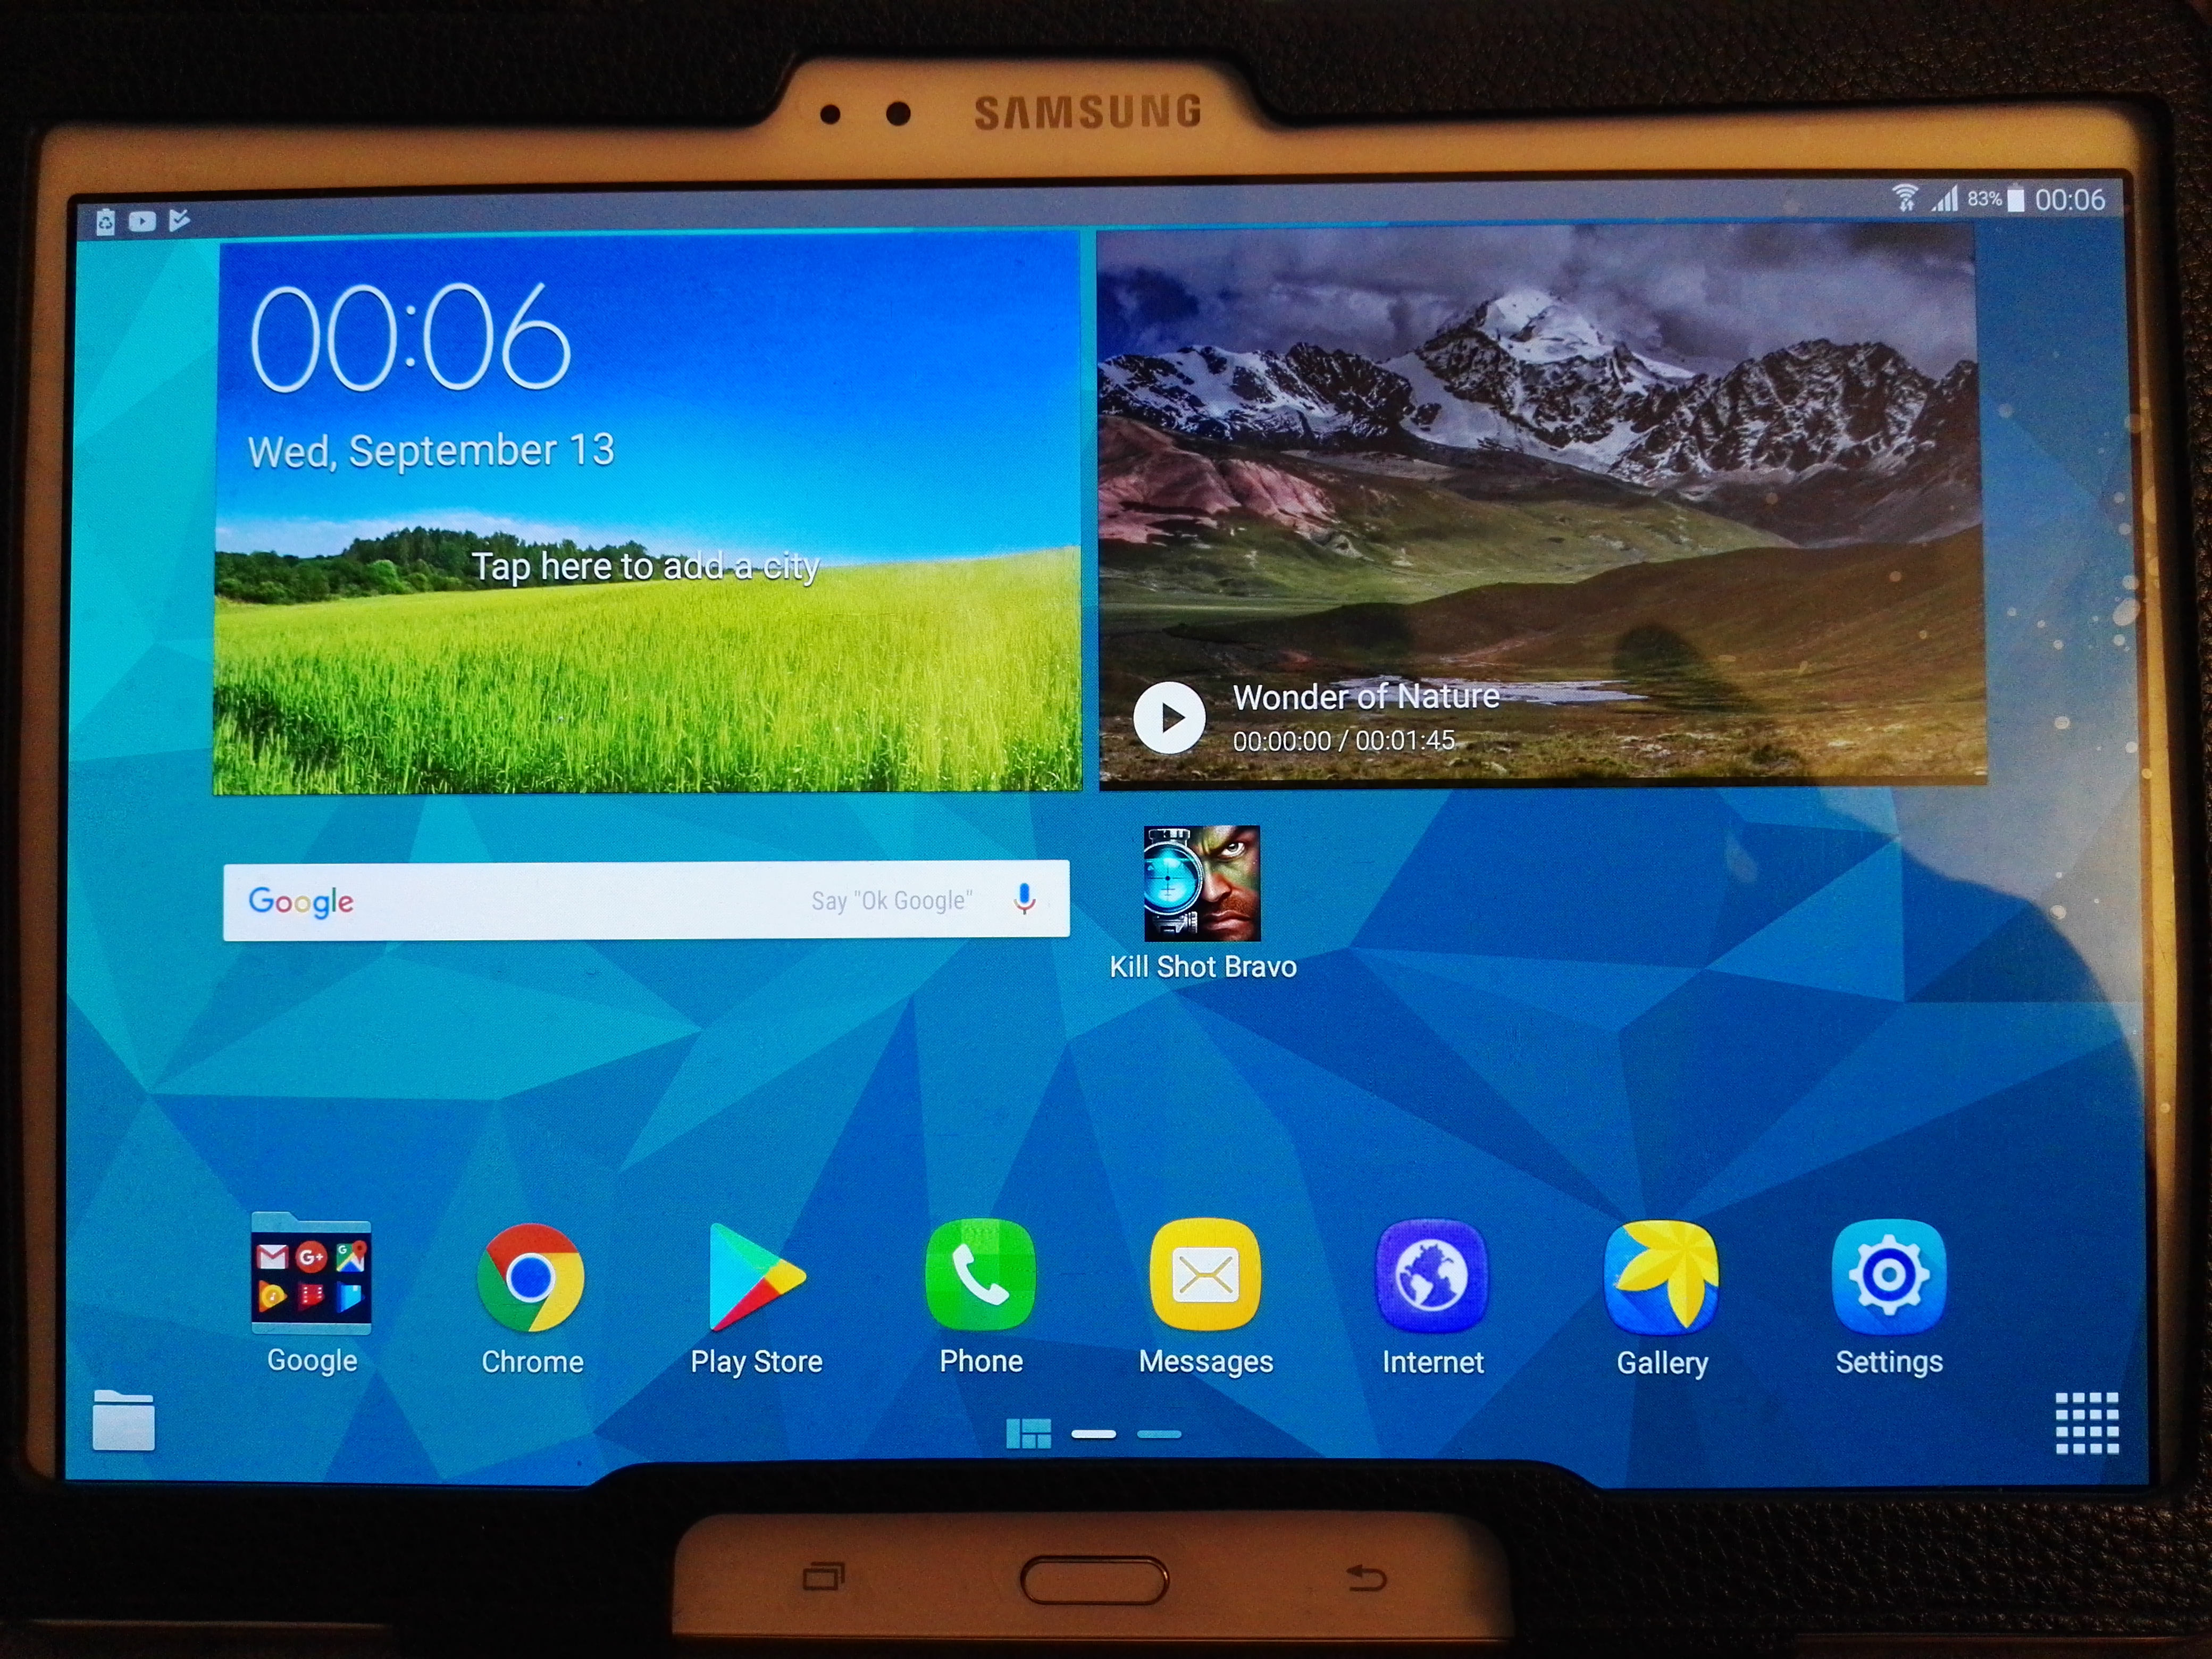
… well, that is a bit of an exaggeration.  I owned a Samsung Galaxy S tablet which no longer worked.  It had the darndest symptoms.

  • doesn’t charge past 77 %
  • takes a day to get to 77%
  • spontaneously restarts shortly after startup

The plan was to take the tablet apart and try and repair it (despite not being a certified hardware repair person)  After all, just how hard could it be?

The repair

The tablet wasn’t that old and was in otherwise perfect condition.  The Internet implied that there were a couple of different parts that might solve the problem.  I was hoping that simply replacing the usb port would be the problem.

https://www.amazon.de/gp/product/B01MFH19ZY/ref=oh_aui_detailpage_o02_s00?ie=UTF8&psc=1

It would have been perfect, the cost for a new port is less than 6 Euros.  There are a number of really good youtube videos to help for replacing the usb port  or how to replace the battery.

The hardest task was actually getting the back of the tablet off.  The video for replacing the usb port makes it look pretty easy.  In that video the back itself is simply pulled off and you don’t need any special tools for that.

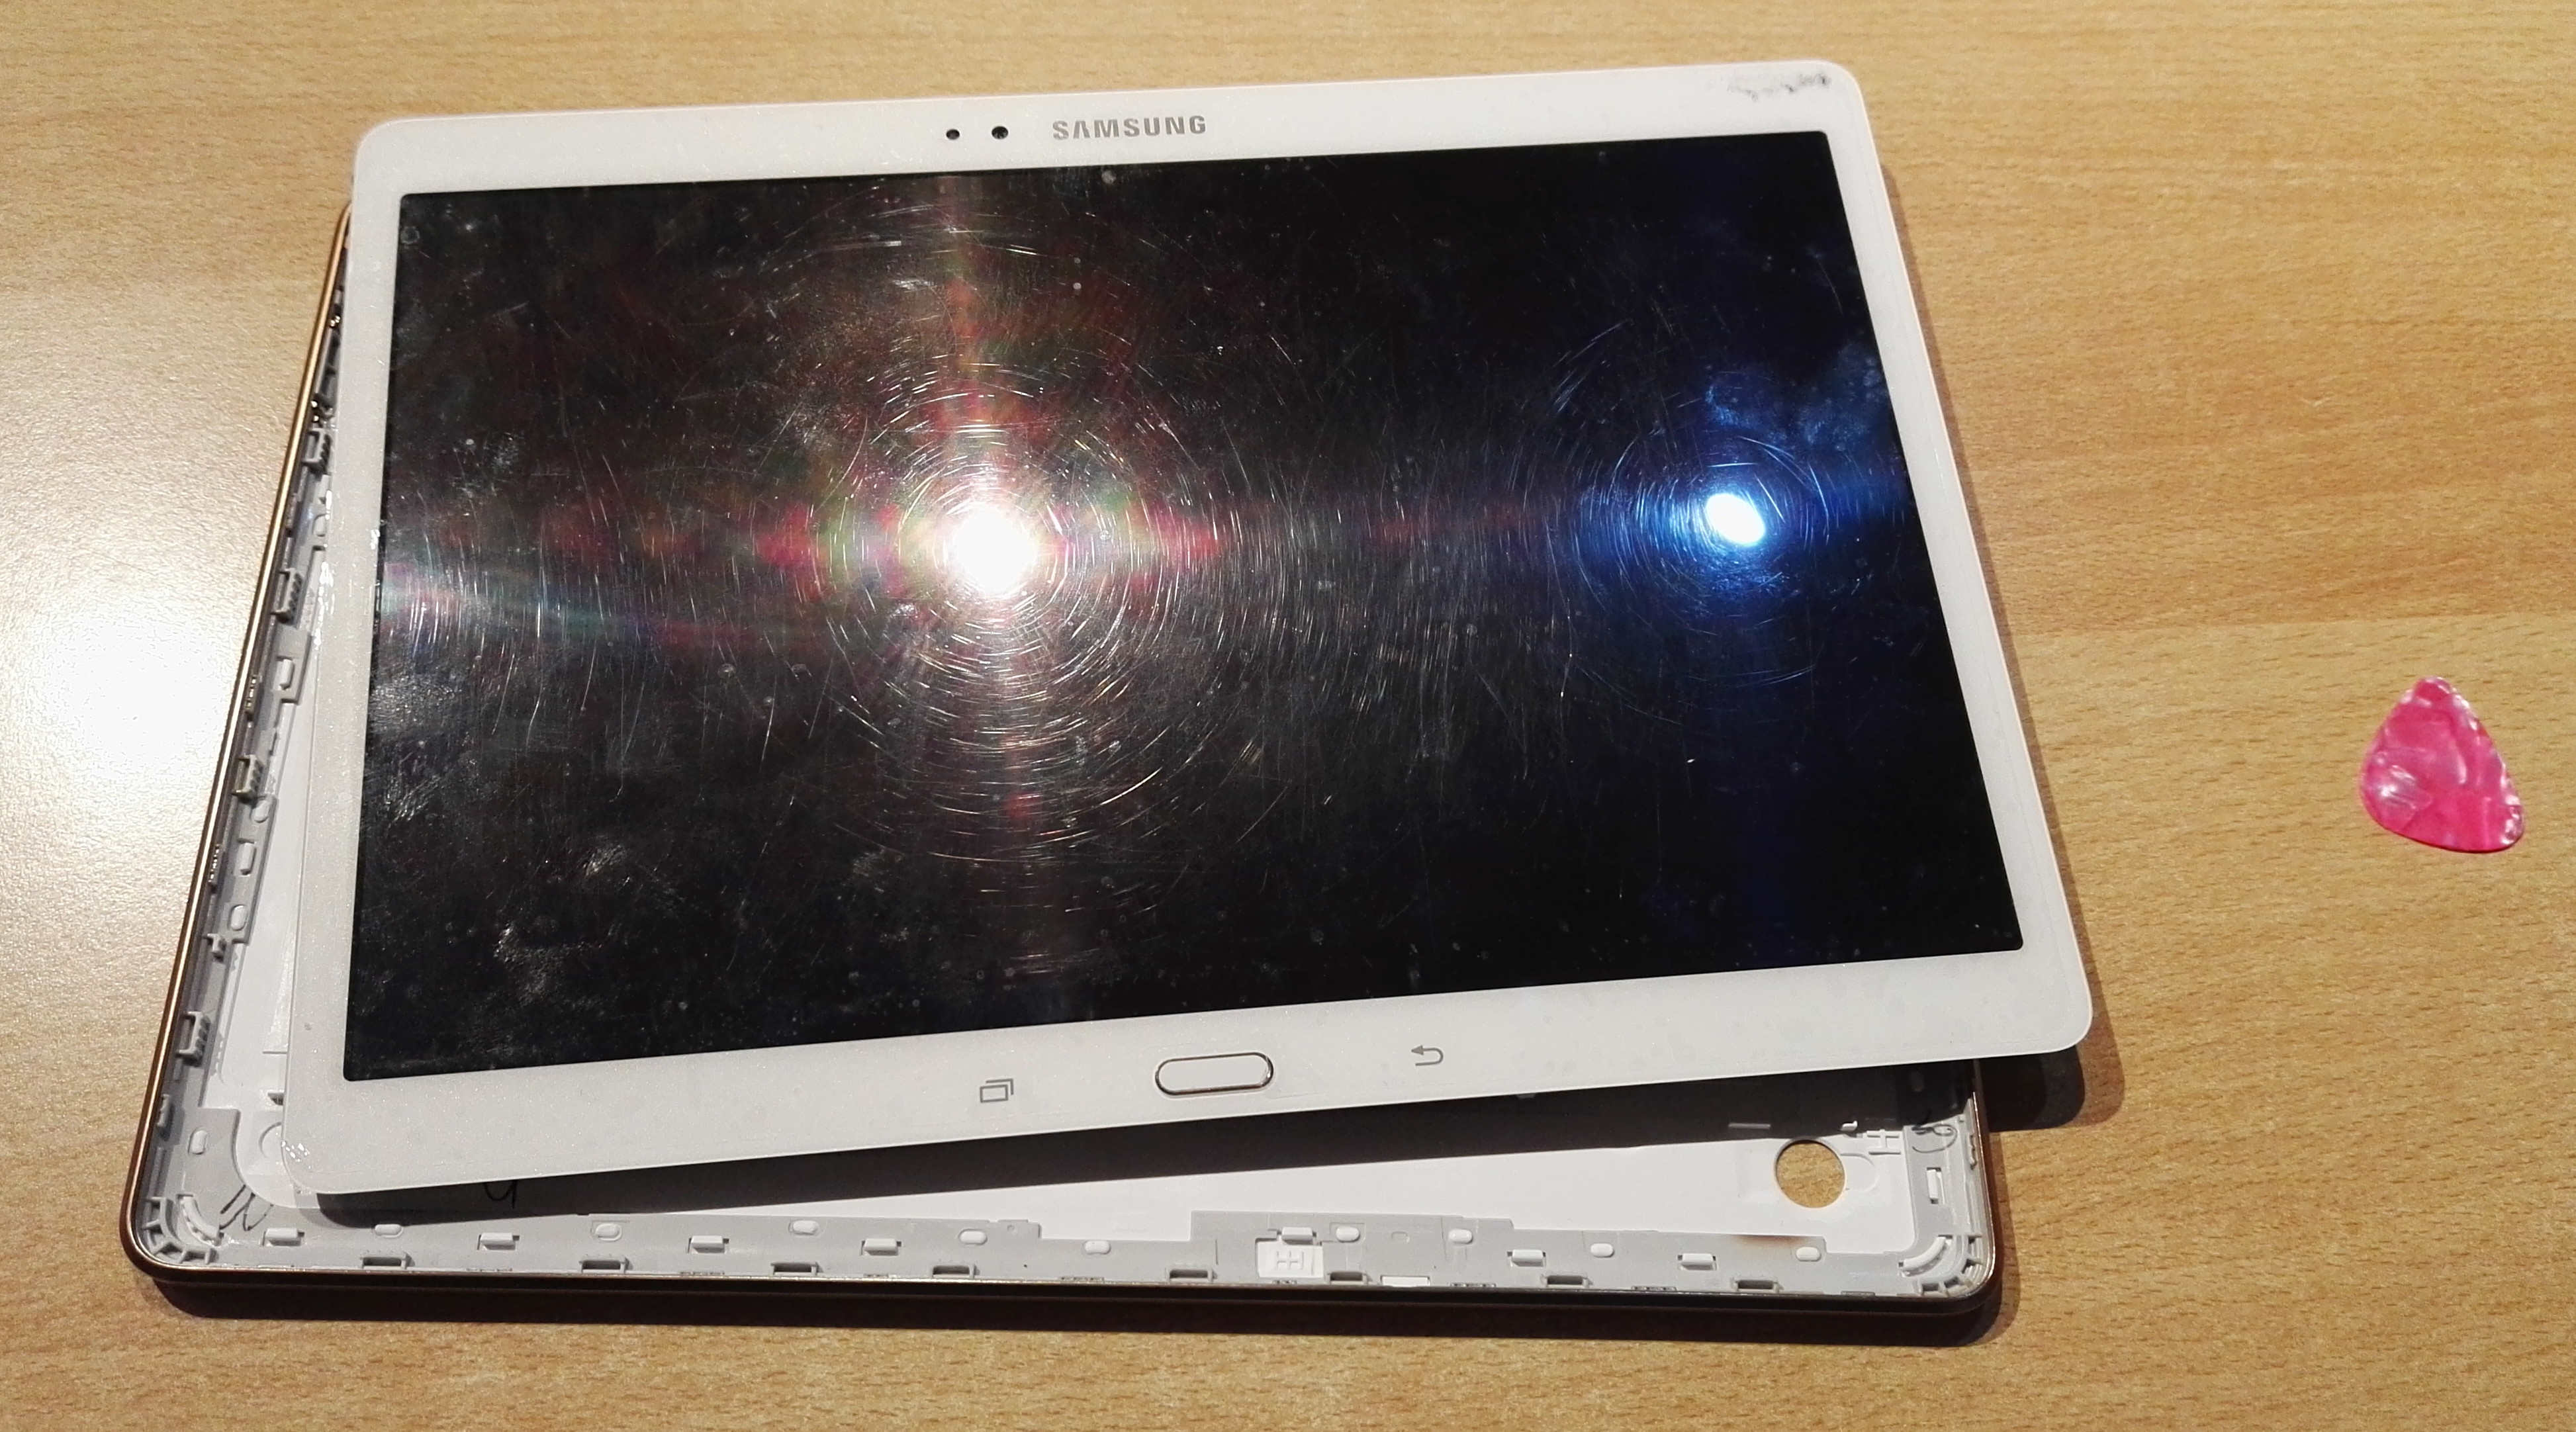
It might be obvious from this picture but when I removed the back I actually pulled the screen out from the other side. This is actually quite similar to how it is removed in the battery video.

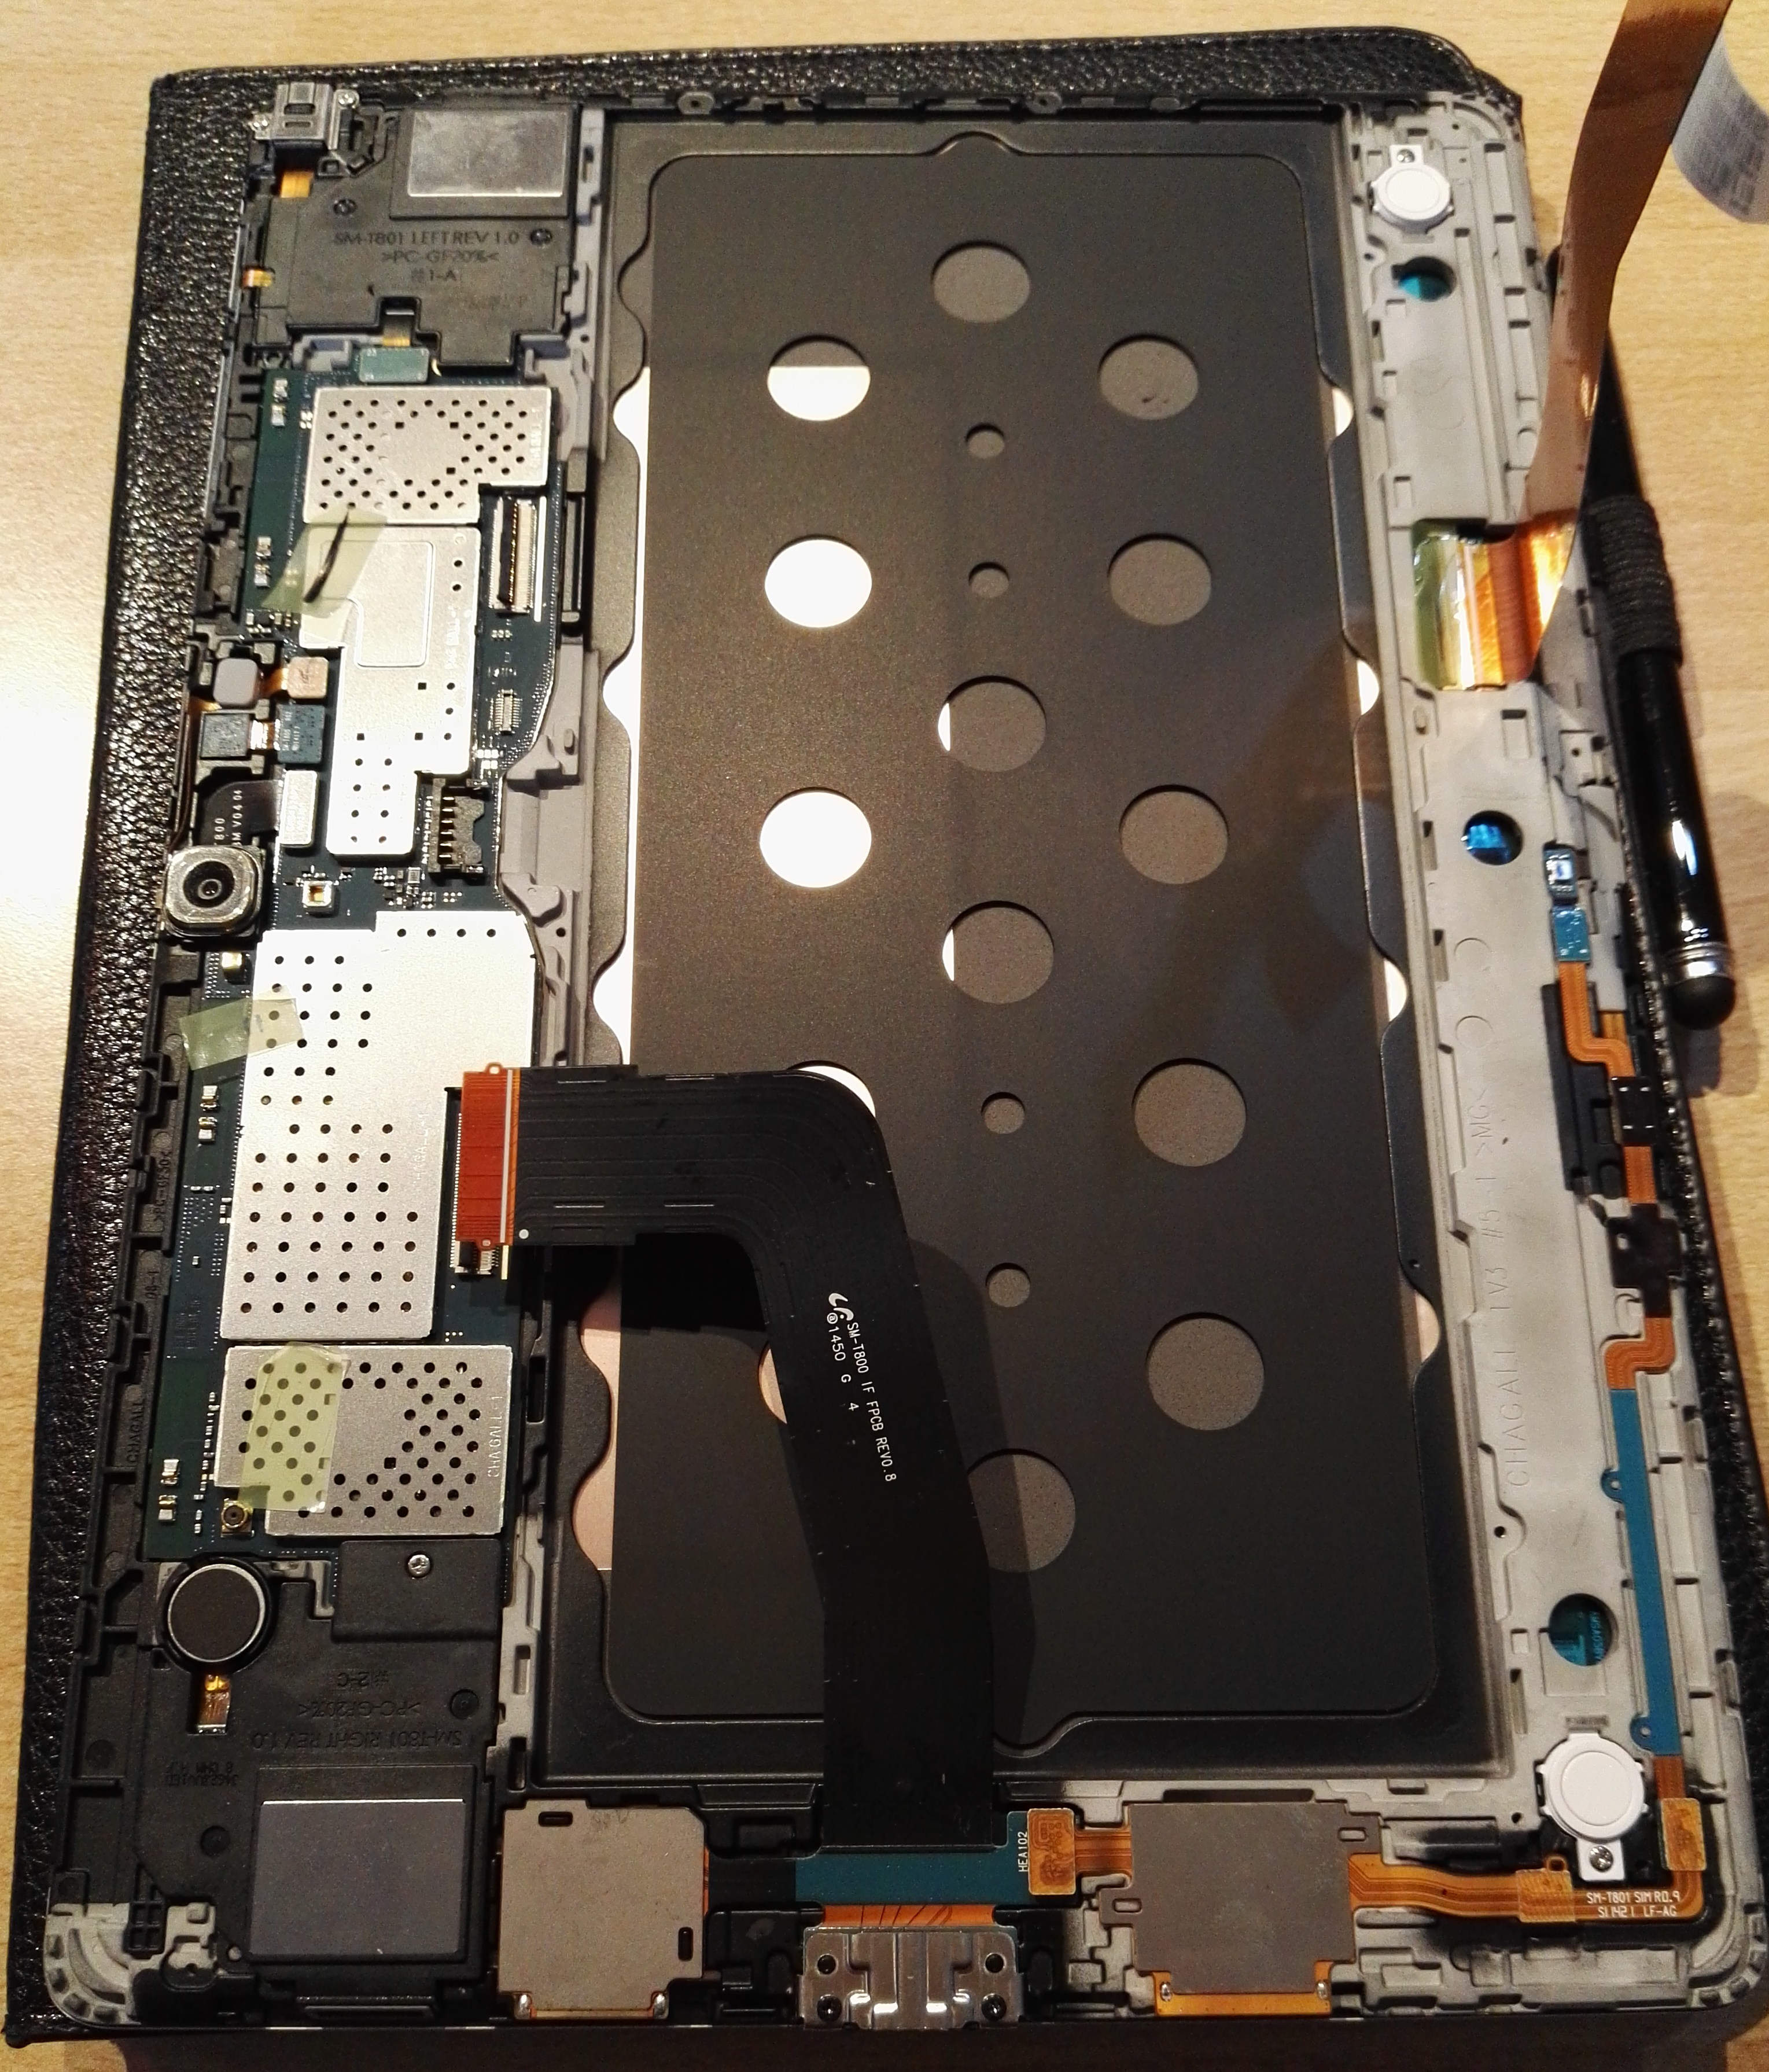
Removing the charger port is actually trivial, especially if you have removed the screen in the way that I did.  The reason is that the back of the tablet is actually two parts.  The first is a rim that goes around the tablet and holds both the screen in from one side and the back from the other side.  This rim actually would make it a bit more difficult to get the port off.

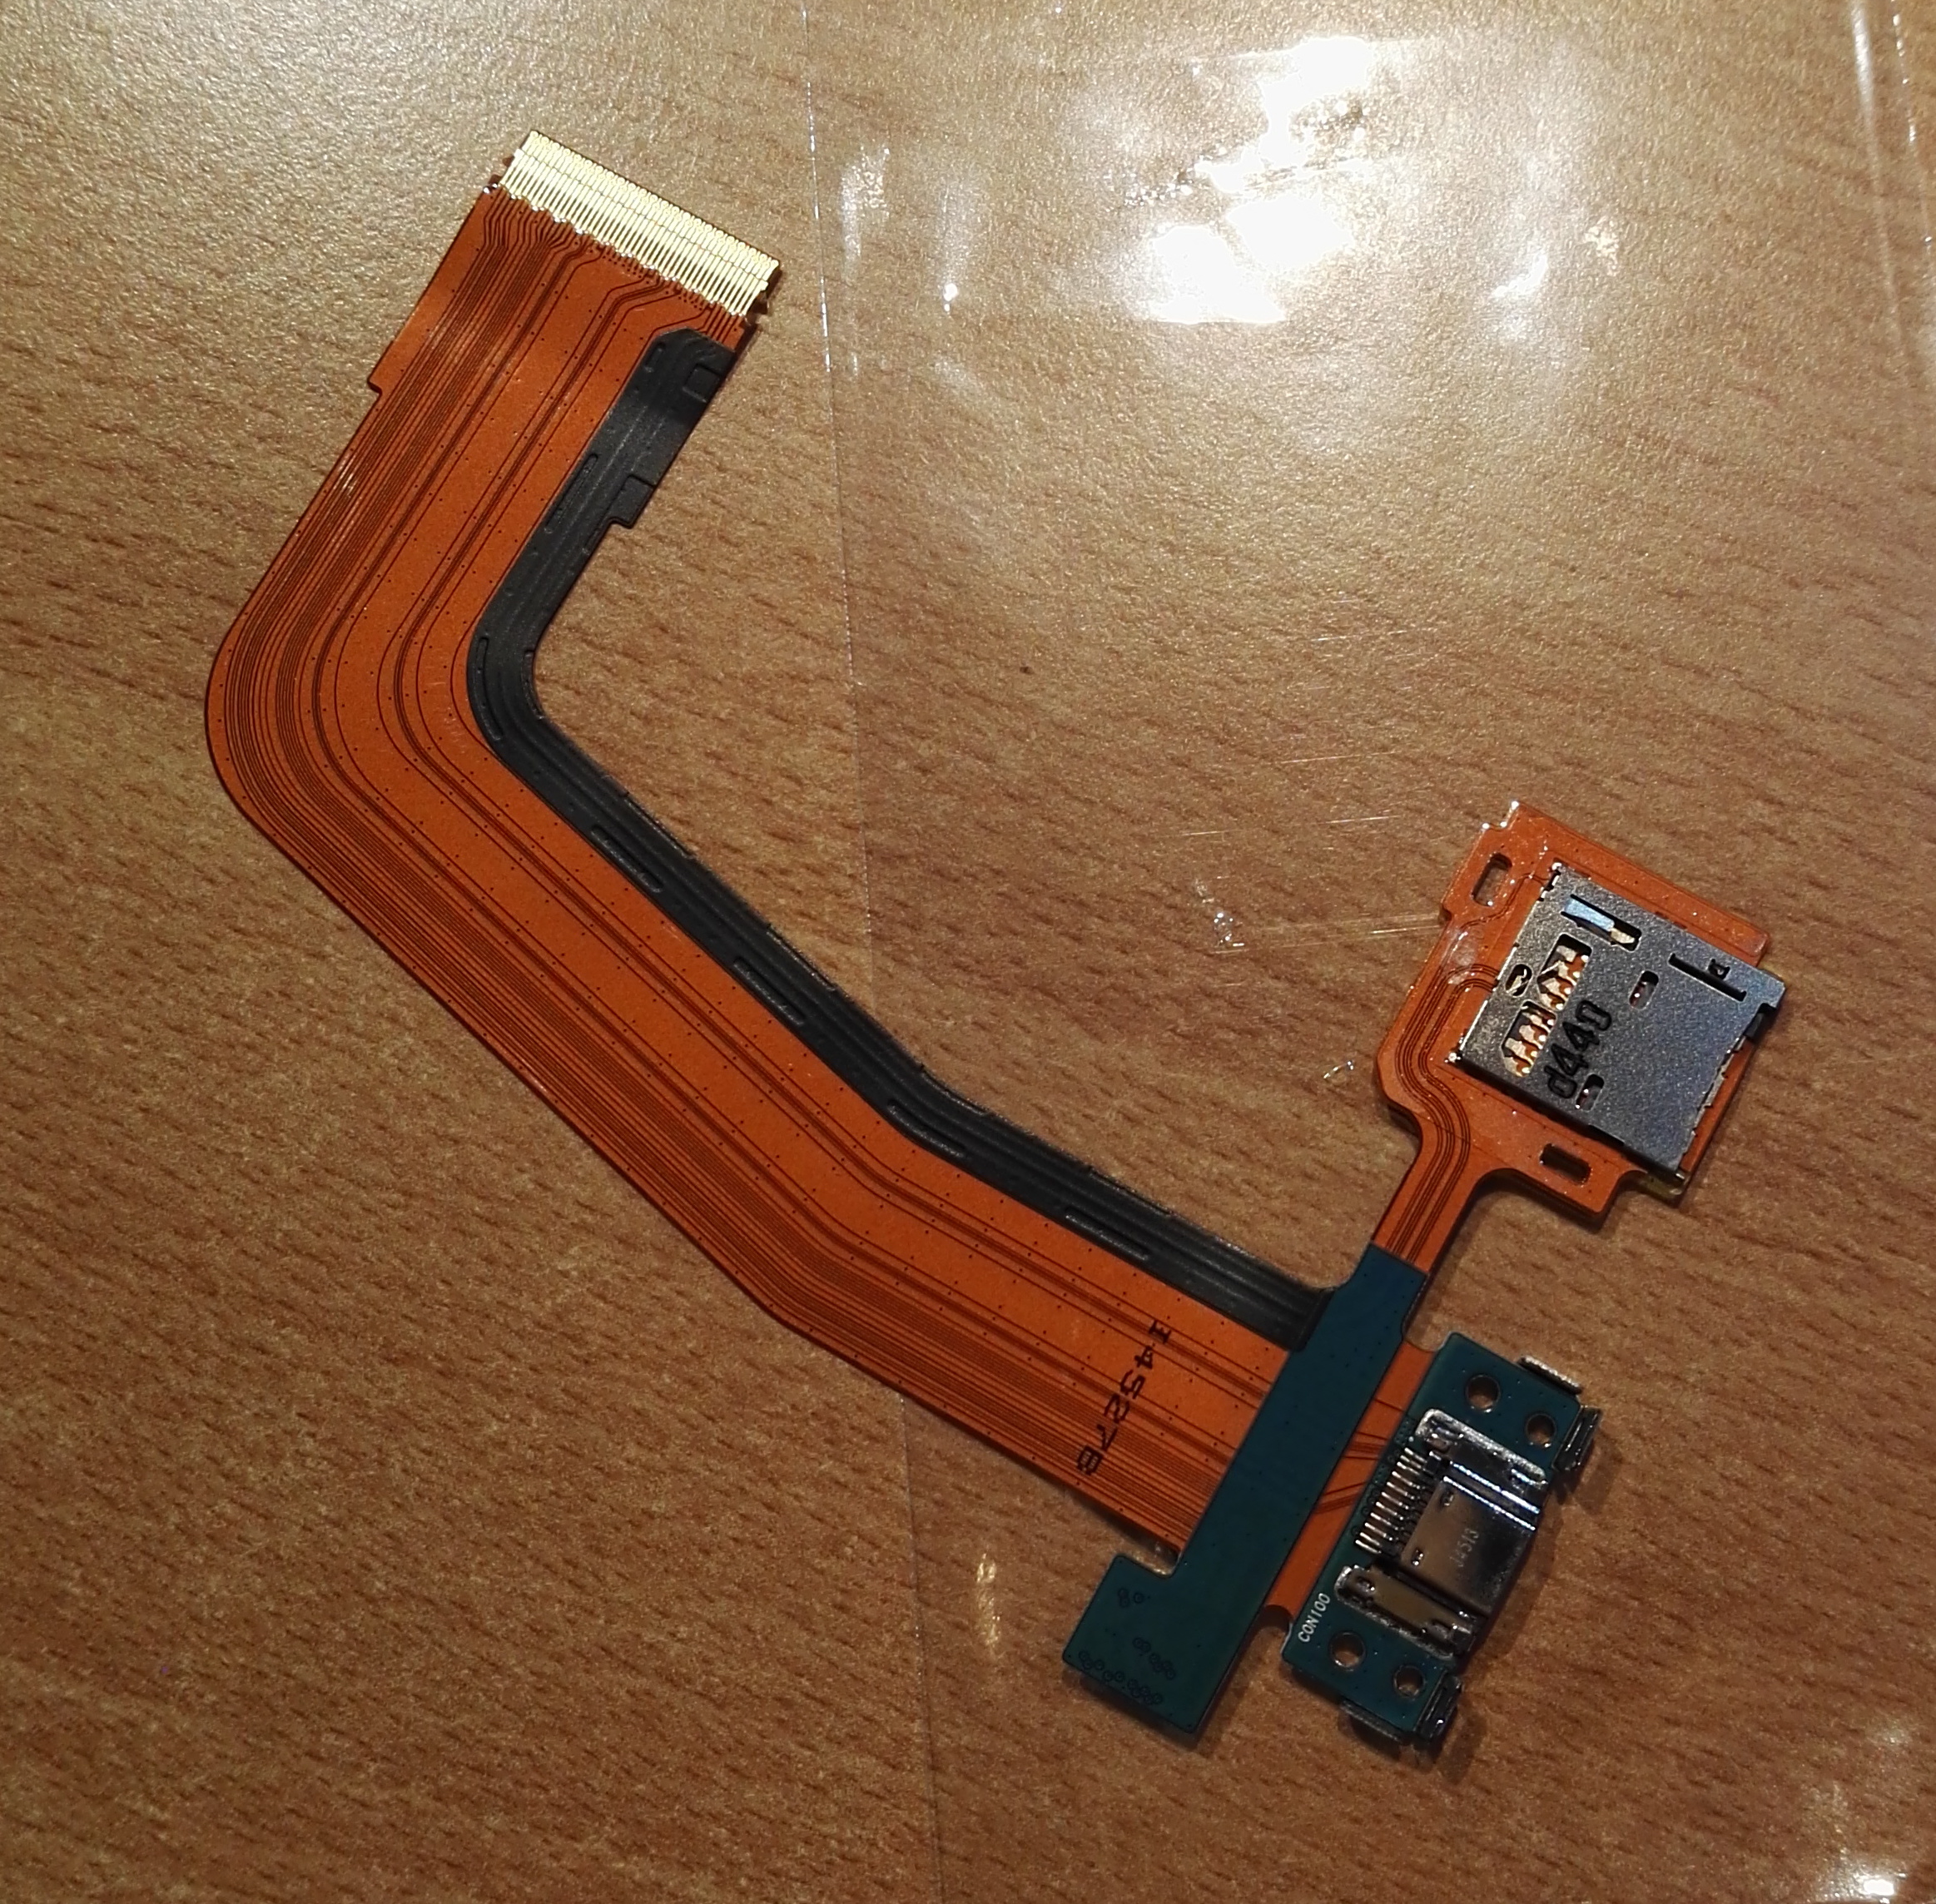
Near the usb connector port is a two screws that hold the port to innards.  Once the screws are removed a small bit of pressure and the port and the sdcard hold pop right off except for a small connector that also attaches to the board.  The other end is a flat cable.  The connector is slightly different as it flips up rather than slides to release the cable.

I had hoped that this six euro part would fix the problem but as it turned out this did not solve my problems. The new port did appear to work but once I removed the power cord from the tablet the device would barely make it to the startup screen.

https://www.amazon.de/gp/product/B00R1A0VK6/ref=oh_aui_detailpage_o00_s00?ie=UTF8&psc=1

The battery is actually even easier to remove than the charging port.  There are four screws that held it in place and then the power cord snaps onto the board.

Lessons learned

Dealing with the insides of this particular tablet was actually very easy to work with.  The most difficulties that I had was trying to get the cover off.  I think that I must have been looking at a different video and it didn’t make the task easier.

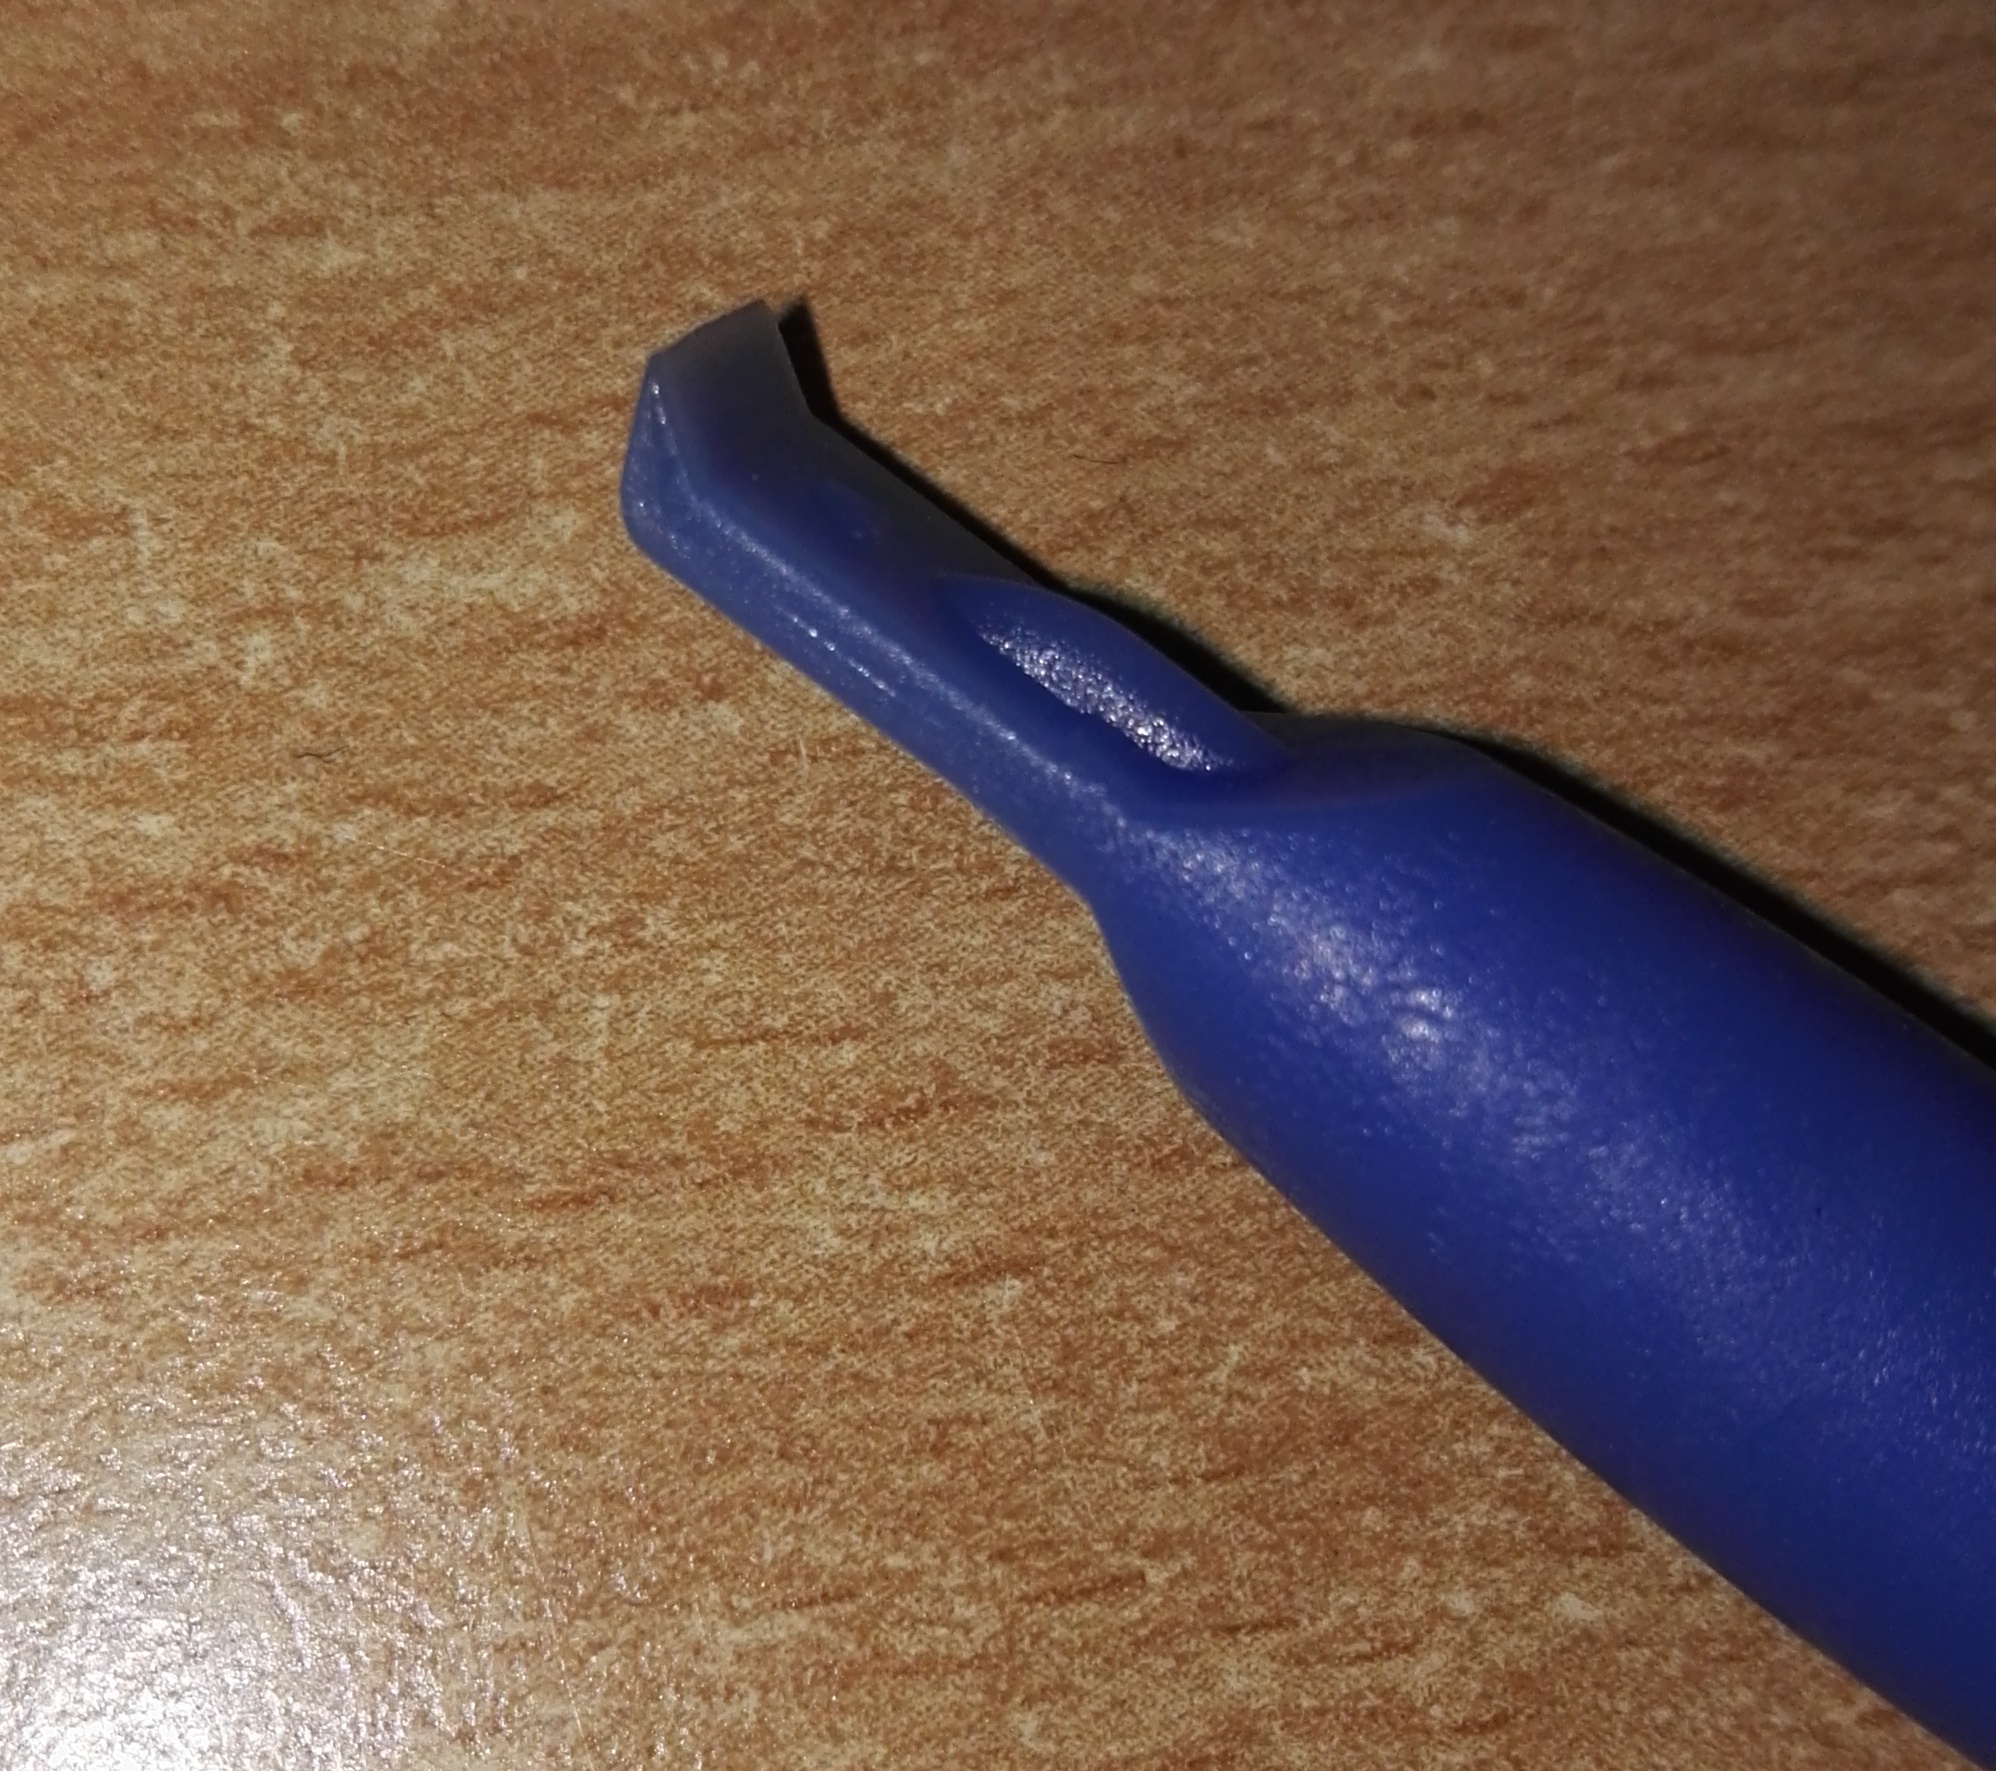
I actually had a small set of tools that offered a number of possibilities but I used the small triangular pic.

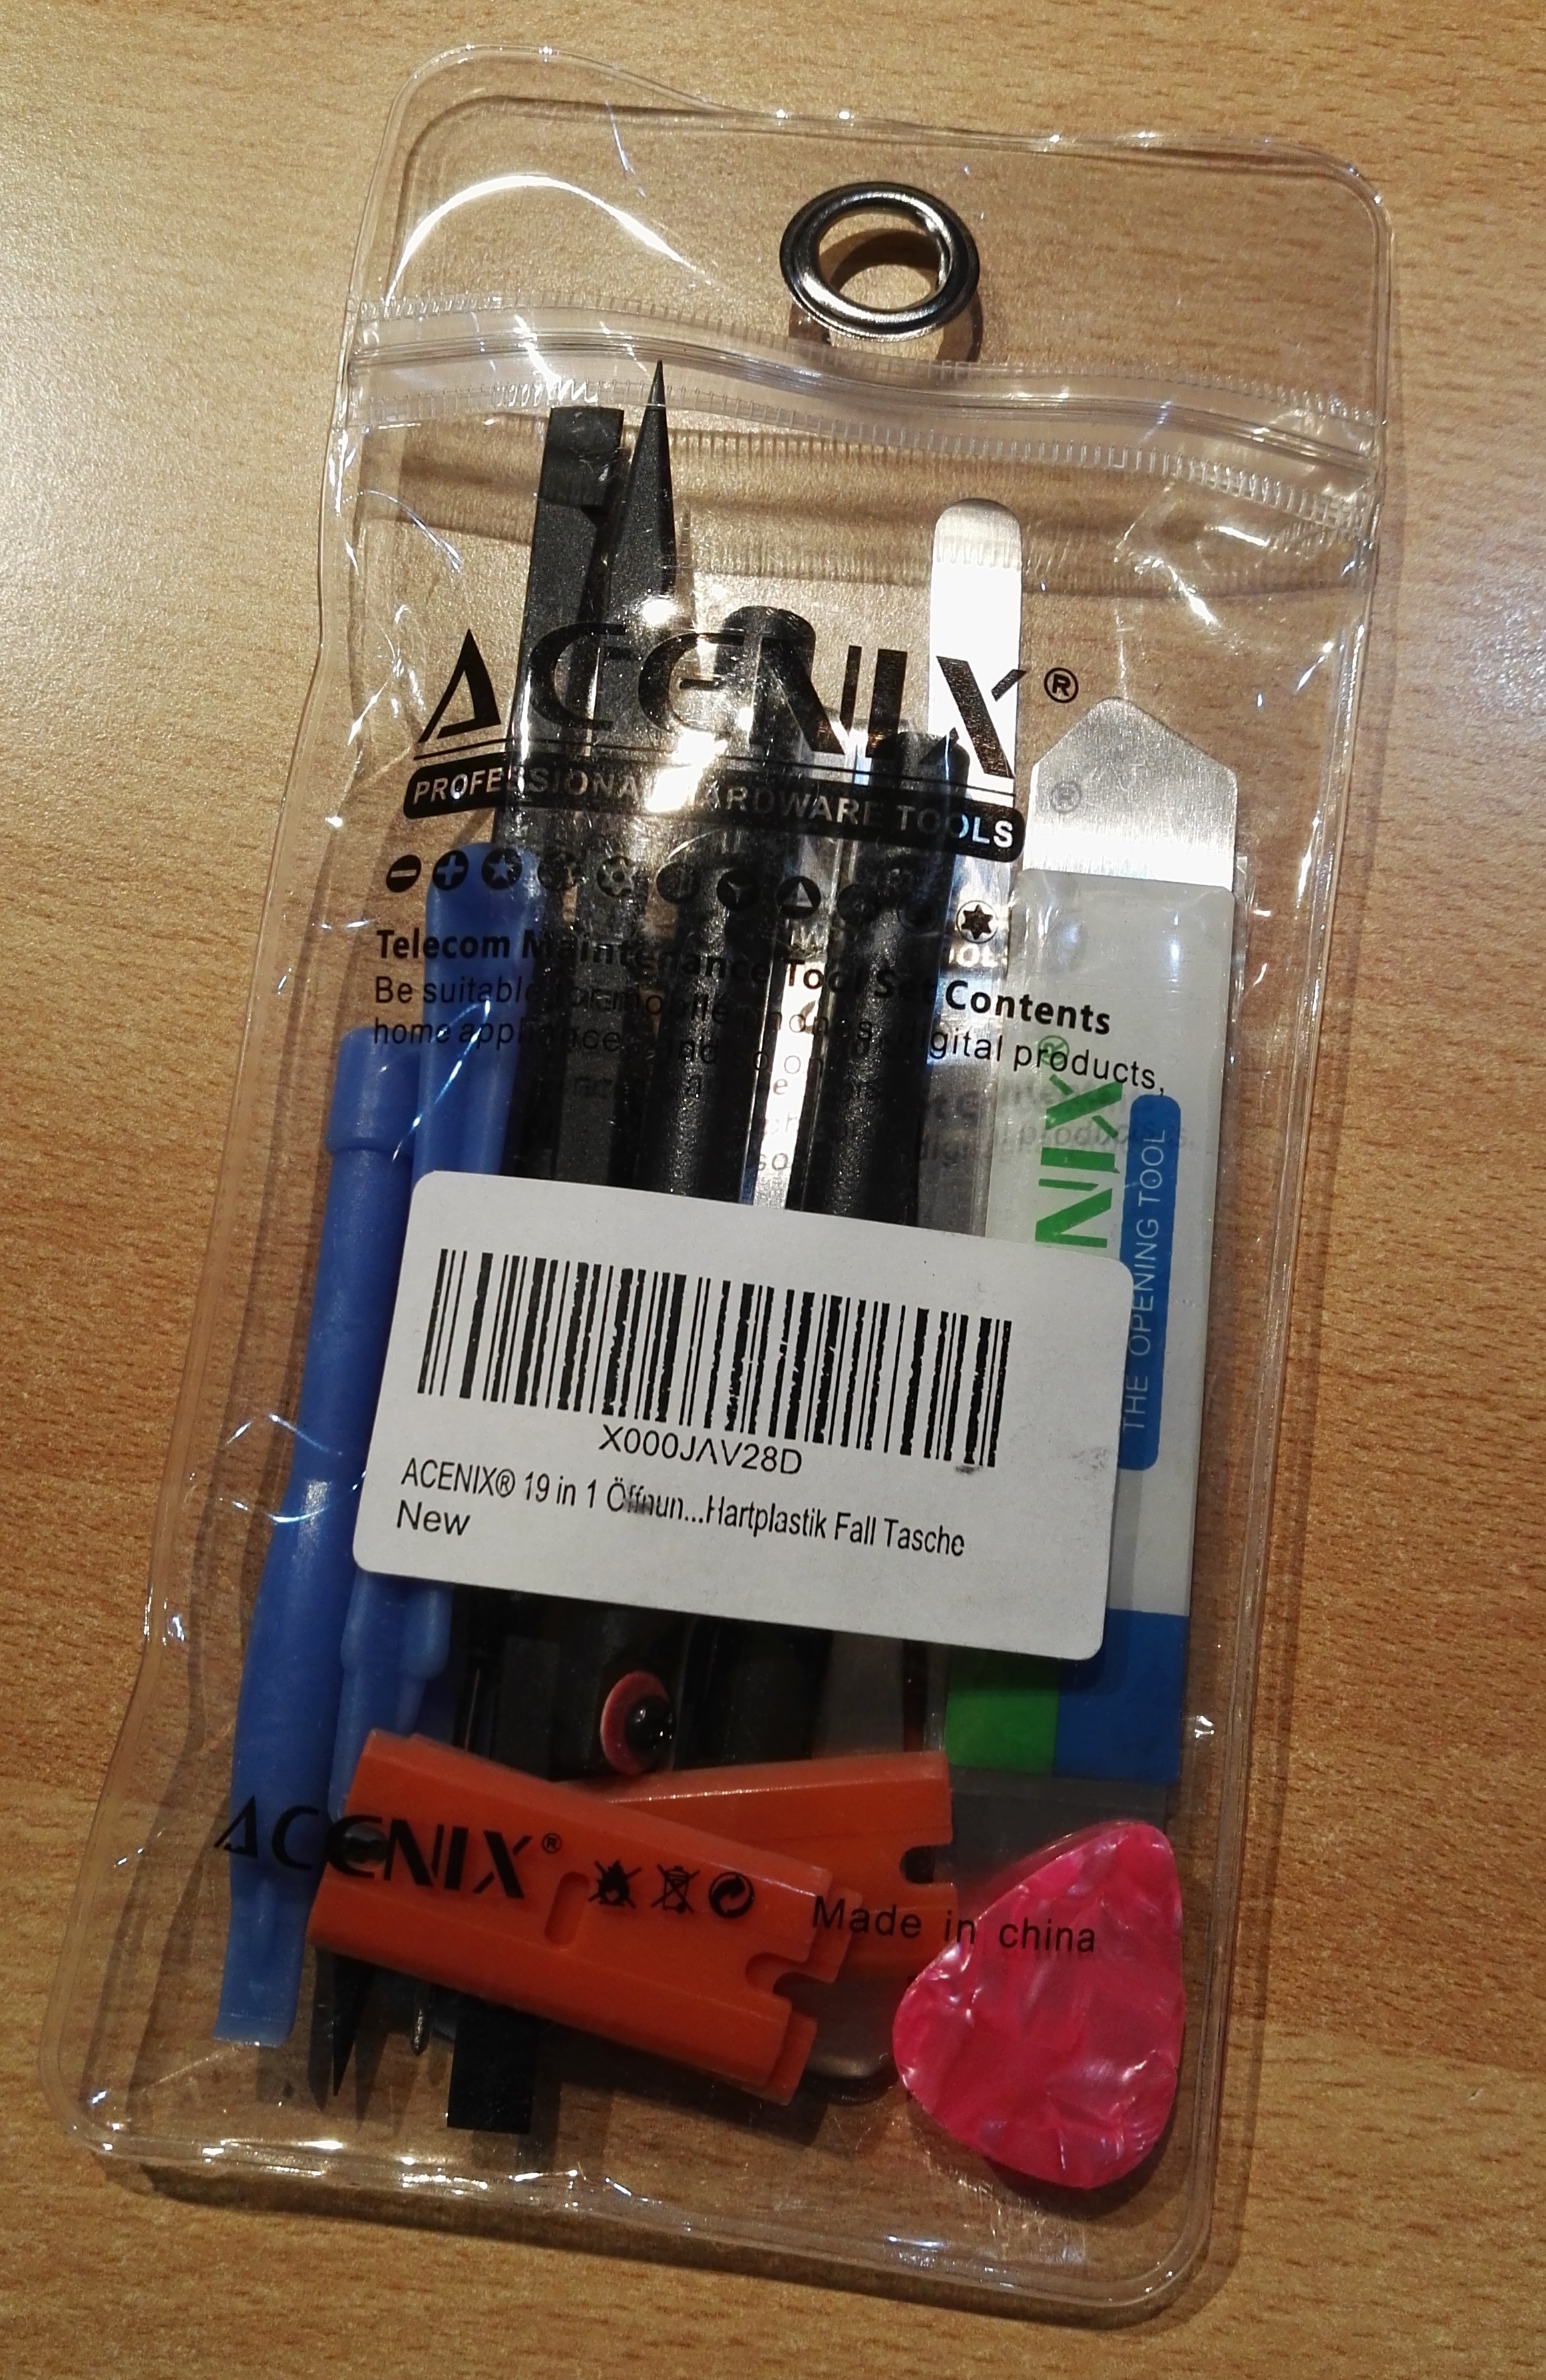
The correct tool appears to have been this tool that I happened to overlook.

Everything works

For the low low cost of about 38 Euros I managed to get my tablet to work.  I wouldn’t have done tried to take this apart if it hadn’t been non-functional and out of warranty. I don’t know how the repairable the newer Samsung tablets are but the older ones appear to be very repairable.

Posted in Setup From Scratch | Tagged | Comments Off on Got a new tablet for the price of fastfood meal …

command line fun – temporary data

Most of the scripts that I need to write don’t actually need to manipulate a lot of data.  It is usually enough to pipe that data through a command or two and use the result.  When this isn’t acceptable then it is usually a small enough amount of data that I can save it in a temporary file with the same name.

Yet there might be a number of cases where truly unique names are necessary.  One example might be if the script gets run many times in parallel but still needs to store some temporary data.

There are a few different methods of generating a unique name.

Process Id

Each Unix process has a unique id and that can be used as part of the file name.  There are some special variables that can be accessed and one of them is $$.  This bash shell variable will be the actual process id of the current shell.

TEMPFILE=mytempdata.$$

This actually should be pretty safe for a lot of situations depending on the volume.

Timestamp

Another fairly classic method of creating a unique name would be to create a timestamp.  This is a terrible device for coming up with a unambiguous name unless the script in question is being run in serial.

TEMPFILE=mytempdata.`date '+%Y%m%d-%H%M%S'`

This example simply uses the date command to display the current date and time.  This date and time is redirected using the backtick.  This can also be done using the more modern method of redirecting the output.

TEMPFILE=mytempdata.$(date '+%Y%m%d-%H%M%S')

Operating system support

There exists the mktemp command which will create an absolutely unique name based on the names of the files or directories in the destination directory.  There is one “little” side effect of this command and that is that the temporary file or directory is created. The file is a zero length file while the directory is a normal directory.

Using the same technique as in the previous example it is possible to both create a unique name while also capturing the name in a variable.

TEMPFILE=$(mktemp /tmp/mytempdata.XXXX)

TEMPDIR=$(mktemp -d /tmp/mytempdata.XXXX)

The operating system cannot know how many free files you might need in your directory. The mktemp command will replace the capital letter X with the unique alphanumeric value.  If more than 999 files might be in use at a time then use four X’s.  The exact location of the capital X is not important.  It can be set as an extension or just a value within the name.


Posted in programming | Tagged , | Comments Off on command line fun – temporary data

virtualbox disk too small ?

The first few times I used VirtualBox it wasn’t clear why you would ever want to create a virtual disk that is dynamic.  I could only envision having three machines each with a disk that wasn’t fully expanded only to run out of real storage when I really needed it.

However, just like real machines it is possible to full up the hard disk and want just a tiny bit more space.  Of course you can add a second virtual disk to your machine but there is another option.  It is actually possible to add to a small extra bit of space to your virtual hard disk, but only under once situation.  It is not possible to expand a fixed size disk beyond its initial size but it is possible to extend a dynamic disk to a larger size.

The steps to extend a virtual harddisk is actually pretty simple.

  1. extend the virtual disk image (vdi)
  2. mount gparted inside the virtual machine
  3. select and extend the partition

Original state

The disk drive associated with my virtual machine was only 10GB.  This is actually more than enough for small tests.

Extend the virtual disk image

This first step needs to be performed on a disk image that is not currently being used by virtualbox.  This step is done by running the command line program vboxmanage.  Simply give the total size of the disk image and the disk is extended.

The command both gives feedback while running and runs really fast.

vboxmanage modifyhd <qualified path to disk> --resize <# of megabytes>

Virtualbox can display the disk size as soon as the command has finished running.

Mount Gparted inside the VM

Simply resizing the virtual disk image is not actually enough.  This will make the disk itself larger but it will not make any more space available to the client operating system inside of the virtual machine.  This space can be allocated to the partition by using some tool to extend the partition.

Gparted is one of the easiest tools to use to enlarge the partition.  However, just like many other Linux tools it needs to be run on a volume that is not currently mounted. In order to do that simply download the gparted live disk and mount it to the virtual machine.

The Gparted live disk will boot up just like on any physical machine, it will bring up a grub menu and let you start the Gparted live installation.

Actual extension of file system

The actual extensino of the file system in this particular case is trivial.  Simply select /dev/sda5 and resize this to use the extra two gigabytes that have been added.

This particular case was trivial by design.  I didn’t want to move the swap partition system to the end of the disk and move the free space to the end of the partition.

You can see that the space has been allocated to the partition /dev/sda2 but not yet being used by the file system.  The next step is to expand the actual filesystem on /dev/sda5

It may seem like a lot of effort to simply add a few gigabytes or more space to a virtual disk image but the entire process can be done in a few minutes.


Posted in programming | Tagged | Comments Off on virtualbox disk too small ?

Virtual hardware -better than the real thing

One of the really neat things about the here and now is all those spare CPU cycles that are available.  With enough CPU power it is possible to create special effects such as adding dinosaurs to movies, bringing historical figures into contemporary films or perhaps bringing space ships and aliens to the big screen.

One of the non-entertainment applications that can take advantage of all this extra power is virtual machines or emulators.

Term Description
Virtual machine or VM Simulating parts of the hardware while providing a virtualized access to the rest of the real hardware.  It is important that the software being virualized has the same architecture.
Emulation The entire hardware is simulated without relying on the CPU to run

All of this sounds good, but what practical things can we use the virtual machine for?

  • Running old programs
  • Safe web surfing
  • Test environments
  • Run an alternate operating systems
  • Create a personal cloud
  • Reuse old hardware

The good news is that there are quite a few free and commercial options available to create such virtual machines. There are a number of companies that provide their own solutions ranging from free through paid versions.  VMWare has their full fledged hypervisor VMWare workstation as well as a lessor version for free VMWare player.  The differences between these two have blurred over the years since the free player was released.

One of the other large companies that also has a collection of free and paid hypervisors is Oracle.  Their product VirtualBox is freely available and like VMWare runs on either Linux or Windows.

Microsoft is also has its own hypervisor which is called virtual pc.  The difference between their solution and the previous two is that the previous two support both Linux and Windows while the Microsoft solution can also virtualize MS Windows.

In the past I used to use VMWare workstation but over time I have come to appreciate VirtualBox.  It is actually quite intuitive to use and it also has a number of different networking options.

VirtualBox Installation

I downloaded my package from Oracle and attempted to install VirtualBox.

# dpkg -i virtualbox-5.0_5.0.10-104061-Debian-jessie_amd64.deb

There are a number of pages to help assist in the installation of VirtualBox on Linux so I won’t be going into it here.

Using VirtualBox

I have been using VirtualBox so much the last few days to try out a number of different Linux distributions.  It is amazing how little configuration is really needed in order to Just download your favorite Linux distribution and create a new VM.

Yet, I wanted to play an old windows game so I thought I would try to setup an windows 7 environment.  The process is actually no more complicated.  Below is a few screenshots of the setup of the virtual machine.

Once this is done the process is virtually identical to using a proper personal computer.  Just put a dvd into the drive and install like normal.

Give a hint to virtualbox which operating system it has to support.

Setup drag-n-drop or clipboard support


Setup the amount of memory for the VM

Assign the amount of cpu/threads to our machine.

Setup VirtualBox to use hardware support (if available).


Select more hardware support


Define the size and location of the virtual drive.


Setup the network adapter – maximum of 4.

As previously mentioned, the process is no different than with a proper physical computer but there is one little thing that must be done in order to connect the host machine’s dvd.

Simply select your dvd (or cdrom) drive

Once all of this is setup simply select your virtual machine setup from the list and press the green arrow to start the machine.  The disk or ISO image will boot up and you can proceed with the rest of the operating system installation as normal.

How good is VirtualBox

I was curious just how good VirtualBox is.  I have installed a lot of Linux VM’s with no discernible problems nor did I have any problems installing Windows 7 for this experiment.

The most honest test that I could think of that would really put VirtualBox to the test would be to try and install a “restore dvd” from an old laptop.  I was actually pretty amazed that the disk booted up just fine … to a point.

The restore disk discovered that it was not running on an HP laptop.  The problem was that the restore disk was created so it would work on an HP, well that particular model HP actually.

This bit of trickery is done by the use a ACPI table (SLIC) in the bios.  It is an interesting history of how Microsoft has used key mechanisms to enable their operating systems.  I hope to cover that one soon.

Posted in Setup From Scratch | Tagged | Comments Off on Virtual hardware -better than the real thing

airplane data security

When I think about airlines I think about a lot of things but I don’t think of high tech. That isn’t very realistic as jet engines are pretty high tech devices and the ability to book reservations over the internet is high tech – simply search by date and city and presto you can select (and pay for) flight within minutes.

It is a pretty clever but all of this “internet access” is just a thin layer over the real backbone of the airlines.  The airlines and travel agencies have had their own legacy system in place to allow for booking of flights.  This system, a so called global distribution system, created to coordinate between the airlines and the travel agencies to prevent selling a seat twice.

However, the older the system the less likely it is to have been programmed to withstand a concentrated external attack by a dedicated attacker.

The neat thing about the internet age is not only the various technologies that exist but also the various white hat hacker groups that exist to investigate these technologies and cast light on these important issues.  One of the oldest such groups involved in this is the chaos computer club which has existed since the early eighties.

The chaos computer club does some amazing clarifications of the weaknesses that they investigated.  A few months ago, they had a Karsten Nohl give a speech about the security or lack of security of this very important system for anyone who flys.

This speech is both an amazing speech on the clarity of how the system works but terrifying how poorly such an important system is protected.

One of the most worrisome parts of this speech, especially for privacy advocates, is where Karsten points out that there is no access logs for this system.  (at 44:20)  This means that either a person or government can track a person and it would be impossible to know that someone has been checking out your itinerary.

There are a lot of things to take away from this speech but one of the surprising for most people is that the luggage tags and boarding passes need to be securely disposed of.

Posted in Soapbox | Tagged , , | Comments Off on airplane data security

Reuse a Pi – Proxy server

The Raspberry Pi was (and still is) an incredible computer. It was the size of a small deck of cards, ran Linux, could manipulate other devices via the GPIO pins, cost only 35 dollars and is just as capable as a normal personal computer.

If one was good then two must be better and so some how I ended up buying a few of them.  I did create my own little weather station and to fool around with other Arduino peripherals.  It was a lot of fun but somehow they got set aside in a shoe box.

It seems to be a shame to not use these so I am trying to find a use for these devices.  The first use was to create a Airprint server so my wife could print from her Ipad.

What is a proxy server

A proxy server is simply a server that is acting as a gateway between two networks. Typically the second network is the internet.  There are a number of different types of proxy server’s that can be installed.

Cache server The server saves the internet content locally.  This makes subsequent calls by either the same or different clients faster as the information is cached locally.

The server is defined to listen to a specific port and the client must be specifically configured to use that proxy server.

Transparent server A transparent server performs the same function as a cache server but with a single distinction.

The client does not have to be specifically configured nor know that a proxy server exists.

Reverse server A reverse proxy performs a similar function of caching results but instead of running on the client’s network for the benefit of the client’s company it runs for the benefit of the web server.  Its goal is to reduce the load from the web server.

Installing a proxy server

In the open source world there is seldom a single option for any given software solution. This is true from web servers to office suites.  There is undoubtedly a number of proxy servers as well but the one that kept coming up in my searches was Squid.

Installing squid on the Raspberry Pi is just as matter of the following apt-get command.

apt-get install squid3

This is a small and self contained program.  The program squid3 is installed into /etc/squid3 along with the squid.conf configuration file.

The default configuration for squid won’t let anything through, you will need to make a few tiny changes.  Below are a few extracts from the configuration.

# Example rule allowing access from your local networks.
# Adapt to list your (internal) IP networks from where browsing
# should be allowed
#acl localnet src 10.0.0.0/8 # RFC1918 possible internal network
#acl localnet src 172.16.0.0/12 # RFC1918 possible internal network
#acl localnet src 192.168.0.0/16 # RFC1918 possible internal network
#acl localnet src fc00::/7 # RFC 4193 local private network range
#acl localnet src fe80::/10 # RFC 4291 link-local (directly plugged) machines
acl localnet src 192.168.178.0/24

In this excerpt I needed to add line 9 for my network.


The change above is used in conjunction with a second change to the configuration file, line 8 below to use this “localnet”.

#
# INSERT YOUR OWN RULE(S) HERE TO ALLOW ACCESS FROM YOUR CLIENTS
#

# Example rule allowing access from your local networks.
# Adapt localnet in the ACL section to list your (internal) IP networks
# from where browsing should be allowed
http_access allow localnet
http_access allow localhost 

This is actually the only configuration that is necessary in order to use the proxy server.


However it is possible to add a few additional lines to try and filter out advertisements a bit.  Just add them at the spot highlighted in the configuration file. This small insert allows me to define places on the internet in a text file or text files of locations that I don’t want to be accessible.

## disable ads 
acl ads dstdom_regex "/etc/squid3/ad_block.txt"
http_access deny ads
deny_info TCP_RESET ads

acl urlads url_regex "/etc/squid3/adurl_block.txt"
http_access deny urlads
#deny_info TCP_RESET urlads

For my proxy server I have setup two text files. The first one is for sites that I want filtered out.  The second text file could contain url’s for sites that deliver advertisements. This makes it easy to either reduce the advertisements for the sites you want to visit while preventing unsavory sites from getting through.


Blocking the URL’s is as simple as you think.  Simply enter the name of the website that you would normally enter into your browser.

adurl_block.txt
www.nakedgirls.com
www.myspace.com

The same is true for blocking the ads as well.  It is harder to give a clear list of which domains are serving advertisements.  It is probably best to find a blacklist of those domains.

There are other sites that are dedicated to keeping up-to-date lists for these advertisement domains. I don’t feel that I am adding any additional value by providing that here.  If you want such a list then you should go and find one of those sites.

https://www.calomel.org/squid_adservers.html

This site also has additional information on how to setup squid.  If you want to learn more visit calomel.org.

Setting up the client

The squid proxy server will look at port 3128 by default.

# Squid normally listens to port 3128
http_port 3128

So when setting up the browser to use the new proxy server point it to the raspberry pi and to this port.

Other notes

When updating the different ad blocking text files you could get these values reloaded by restarting squid or by running the reconfigure option which will re-process the configuration file.

squid3 -k reconfigure


Posted in Setup From Scratch | Comments Off on Reuse a Pi – Proxy server

bash – More powerful than a speeding locomotive

(flashback)

Our project was inching closer and closer to going live.  On the evening before the Easter break some clod started a massive report which tried to process all the data since the beginning of time. My colleague’s inefficient program gathered up all of the data from the database and wrote it to the data directory in a temp file.

The data directory was more than large enough for a test environment but it wasn’t a big enough for such a test.  We could have easily recovered if it had occurred while we were at work but instead the system attempted to process nightly batches over those four days without enough space and made a pretty big mess.

My boss Theodore was more upset than he should have been for a test environment and kept yammering on about what if this has been production.  He was right of course but one of the preconditions of the system is that enough resources are available.  It is our groups responsibility to write the programs but it is someone else’s to ensure that the system doesn’t run out of resources.

Anyway, we implemented the boss’ warning email feature.  Each time the program is run it checks for enough disk space when not enough space exists then send out a warning email and quits. To be on the safe side, my boss asked that I have my email address as one of the recipients.

(the present)

If I receive one more warning email from one of the test systems I am afraid I am going to kill someone.

Von: Automatically.Generated.Message@acme.com [mailto:Automatically.Generated.Message@acme.com] 
Gesendet: Dienstag, 7. Februar 2017 11:54
An: process_monitoring@acme.com; 
Betreff: Warning ... the end is near on acme-app1

An error has occurred, the copy app has not been launched 
because of insufficient disk space on following partition.

Filesystem             size   used  avail capacity  Mounted on
acme-app1_dpool/app    85G    85G     0K   100%    /appdir

Corrective action is required immediately.


The status of rest of machine is as follows.

Filesystem             size   used  avail capacity  Mounted on
/                       10G   7.7G   2.3G    77%    /
/dev                    10G   7.7G   2.3G    77%    /dev
proc                     0K     0K     0K     0%    /proc
ctfs                     0K     0K     0K     0%    /system/contract
mnttab                   0K     0K     0K     0%    /etc/mnttab
objfs                    0K     0K     0K     0%    /system/object
swap                   140G   400K   140G     1%    /etc/svc/volatile
fd                       0K     0K     0K     0%    /dev/fd
swap                   8.0G   700M   7.3G     9%    /tmp
swap                   140G    40K   140G     1%    /var/run
acme-app1_dpool/app    85G    85G     0K   100%    /appdir
acme-app1_dpool/acme_home   1.0G   353K   1.0G     1%    /appdir/home/gast
acme-app1_dpool/acme_samba   2.0G    36K   2.0G     1%    /appdir/samba
acme-app1_dpool/acme_scripts   2.0G   249M   1.8G    13%    /appdir/scripts

This is an automatically generated message for informational purposes.

The idea seemed ok; when no disk space exists then send out an email.  The underlying assumption was someone in IT would deal with the problem.

Apparently the idiot users turn off half of the system about a week back but not every process.  I came to work and found hundreds of emails clogging up my inbox.  Looking through them you could literally see the space filling up over time.

Well, hundreds of files are annoying but the general functionality is awesome.  A combination of the bash script and sendmail allows me to capture the important facts about our system and send it to someone.

Just look at the script.

#!/usr/bin/bash
SUBJECT="warning the end is near"
DF_Command=`df -h ${FILESYSTEM}`
FULL_DF=`df -h`
TO=process_monitoring@acme.com
FROM="automatically generated message"

HOSTMACHINE=acme-app1

( cat << !
To: ${TO}
From: ${FROM}
Subject: warning ... the end is near on $HOSTMACHINE

An error has occurred, the copy app has not been launched because of insufficient disk space on following partition.

${DF_Command}

Corrective action is required immediately.

The status of rest of machine is as follows.

${FULL_DF}

This is automatically generated message for informational purposes.
!
) | /usr/sbin/sendmail -t

Fill the variables with information ranging from a single word up to a lot of lines of text and then substitute them into your mail.  The bash shell will expand them before sending the mail out.

I guess that the moral of the story should be that more logic should be used because some idiot will inevitably trigger it on a non-production environment.  Well, that or just get rid of the idiots ….


Posted in programming | Tagged , | Comments Off on bash – More powerful than a speeding locomotive

facial scans coming to an airport near you

We want to protect you from the world.

I think that a lot of people want to do the right thing and protect others from bad things. Sometimes this takes shape in the form of a law or a rule that prevents bad or dangerous behavior.  The rule usually looks pretty innocuous – you should not put poisonous chemicals into peoples food or drink.  I think that everyone would easily agree to this simple rule.

Where exactly do you stop?  Does that mean that grilled food and french fries cannot be eaten as they may kill you?  Does that mean we need to tax food that when eaten in a large enough quantity will make you sick?  Should we tax foods with a high sugar content?  Perhaps we should ban some ingredients such as transfats for the same reason.  Some of the food that we eat is killing us so I guess that food or product should be eliminated – right?

This type of slippery slope is a classic example of mission creep where a focused task ends up morphing into something altogether different.

Biometric photoshoot at the airport

The project is called “Biometric Exit” and would match the photo of the visa holder as they are leaving.  I guess this would be an improvement.  Instead of a database with an entry that says the visa holder has left there will be a bigger database entry that also includes a departure picture.  I would guess an arrival photo would also be nice.

This might be an easy way to see who is overstaying their visit and I would guess the penalty for overstaying might be loss of future visa privileges.  This solution, even if rolled out to all of the american international airports, does not really track the people the US is most interested in – the people who have overstayed their limit.

Well, that is not entirely true.  I suspect that at all of those international airports your photo will be taken regardless of if you go from New York to Singapore or New York to Sacramento. If they do the second one then they are actively tracking people who are not tracking the country.

In addition to all this extra photo recognition there is another feature of this program. This facial recognition system will be shared with other agencies and perhaps the airlines themselves.  If this database is shared with the airlines it is just a hop skip and a jump before the shops in the airport scan your face and send you an sms trying to sell you stuff.

Just imagine what the next steps might be.  Simply connect this system up with the other government database.  Feed in the department of motor vehicles, US passport database, military roster database, former and current prisoners. That is just to get started, within a decade this type of photo check could be required before entering any Federal building in the US.

Beyond that, once all of the infrastructure is in place this system could eventually be used to track down anyone with an outstanding ticket, late child support payments or even if you owe income taxes.  This system could become a premier method of tracking people within the US and not just the visitors.

I am confident that the government doesn’t have anything like that in mind – right?

Posted in Soapbox | Tagged , | Comments Off on facial scans coming to an airport near you

From computers to microcontrollers

I kept telling Mikhail that the big advantage to using the Raspberry Pi was no matter what project I put it into I could set it on the window sill and ssh to it.  It was a fast small and affordable personal computer.  He kept telling me that the Raspberry Pi and Raspbian wasn’t a real-time solution and that I should consider something else.

He was of course right but this didn’t matter for most of the things that I was using the Raspberry Pi.  The best example of a custom solution was the led cube that I created that displayed various patterns.

The Raspberry pi did a super job for my cube but when I tried to use it on a distance sensor project using the HC SR04, I definitely had mixed results.

I wanted to use my cube more often but there was no convenient way to turn it off, well without first connecting to it via ssh and shutting it down.  It took too long to boot, too long to shutdown, and requires a proper shutdown.  What about migrating from a computer to a micro-controller – it starts faster and can simply be powered off.

Cheap as potato chips

Mikhail kept telling me that micro-controllers were cheap as potato chips and could easily be included into virtually any project. To encourage this path he decided to do this old school which meant a pile of chips, an AVR programmer, LED’s, resistors, a breadboard and a bunch of wires.

AVR Programmer

attiny85

Mikhail comes from the electrical engineering side of computers and it was him who discovered, all those years back, some of the interesting projects being done with LED’s.  Below are a few interesting projects that he showed me from the internet.

Well, I come from the software side but was willing to learn.  I no longer have photos of those old projects but I put together a rather similar example.

Instead of one of those ATTINY85’s I have used an ATMEGA328.  Granted the 328 is a much nicer chip but for the task of doing I2C the two chips are equivalent.

Hardware setup

It has been awhile since I used Fritzing or Eagle to write up a circuit diagram.  I will simply show which pins need to be connected up.

ATMEGA328 MCP 23017 Comments
A4 (pin 24) Pin 12 I2C pin SCA
A5 (pin 23) Pin 13 I2C pin SDA
5V Pin 9 (Vdd) 5 V power
GND Pin 10 (vss) Ground
Pin 15 (A0) tie to ground
Pin 16 (A1) tie to ground
Pin 17 (A2) tie to ground
Pin 18 (! reset) tie to 5v
GPA 4 connect to led
GPA 5 connect to led
GPA 6 connect to led

I2C explained

The I2C bus was created by Philips in the 1980’s.  It was actually a rather clever design decision for connecting CPU’s and peripheral chips together.  The use of a single bus is much more efficient in terms of wire used.  All chips on the bus do listen for commands that are relevant to them. This is is because each chip has its own address and thus listens for its own address.

It is possible to add any number of bytes via this bus to the receiving chip.  The bus is bi-directional, I can send messages to another chip but I can also read back responses from those chips.

The actual description of the how the low level technical details for this two line bus is actually better described elsewhere.  One explanation can be found on Wikipedia I2C.

The good news is that you don’t need to know how the bits are sent over the wire to use it.  Arduino has a very simple class Wire which makes this task almost trivial.

Wire Method Description Example
begin() initializes connect to bus Wire.begin()
beginTransmission(adr); begin command to send to device “adr” Wire.beginTransmission(0x20);
write(byte2send) sends a single byte to device from begintransmission Wire.write(0x00);
endTransmission() builds entire command and transmits it to device. Wire.endTransmission();

Lines 10 – 13 is an actual example of sending the value 0x00 to the register “port” on device 0x20.

Software

This sample bit of code will simply turn on the green led, yellow led and red led in turn with a pause between each one and then it will turn all leds on for 1500 milliseconds.  Finally it will turn off all the leds for 1000 milliseconds (one second).

This particular project is not completely interesting in itself but rather as a stepping stone to more interesting devices.  I will be replacing my raspberry pi with this Arduino in my next blog.

#include <Wire.h>

int GPA4 = 0x04;
int GPA5 = 0x08;
int GPA6 = 0x10;
int PORTA = 0x12;

void alloff(int port)
{
  Wire.beginTransmission(0x20);
  Wire.write(port);
  Wire.write(0x00); // all pins off
  Wire.endTransmission();
}

void scanner()
{
  Serial.println ("\nI2C scanner. Scanning ...");
  int found = 0;

  for (byte i = 1; i < 120; i++)
  {
    Wire.beginTransmission (i);
    if (Wire.endTransmission () == 0)
    {
      #if 0
      // this is much simpler but takes 2k more of program space.
      char buffer[128];
      sprintf(buffer,"Found address: 0x%02x",i);
      Serial.println(buffer);
      #endif
      
      Serial.print ("Found address: ");
      Serial.print (" (0x");
      Serial.print (i, HEX);
      Serial.println (")");
      found = 1;
      delay (10);
    }
  }

  if (found)
    Serial.print ("Found device(s).");
  Serial.println();
}  // end of setup

void setup()
{
  // real initialisation stuff
  Serial.begin (115200);
  Wire.begin();

  // do a bit of searching for things.
  scanner();

  // setup our 23017
  Wire.beginTransmission(0x20);
  Wire.write(0x00); // IODIRA register
  Wire.write(0x00); // set all of port A to outputs
  Wire.endTransmission();

/* we dont actually use port b
  Wire.beginTransmission(0x20);
  Wire.write(0x01); // IODIRB register
  Wire.write(0x00); // set all of port B to outputs
  Wire.endTransmission();
*/
  alloff(PORTA);
}

void expanderPinOn(int port, int pin)
{
  Wire.beginTransmission(0x20);
  Wire.write(port);
  Wire.write(pin);
  Wire.endTransmission();
}

void loop()
{
  expanderPinOn(PORTA, GPA6);
  delay(600);
  expanderPinOn(PORTA, GPA5);
  delay(600);
  expanderPinOn(PORTA, GPA4);
  delay(600);
  expanderPinOn(PORTA, GPA4 | GPA5 | GPA6);
  delay(1500);

  // off
  alloff(PORTA);
  delay(1000);
}
Posted in programming, Setup From Scratch | Tagged , | Comments Off on From computers to microcontrollers

enhancing the privacy we still have

Is privacy is simply too much work?

The problem is not that technology cannot help out but in my case it seems that I am constantly installing or setting up new computers or virtual machines and there is never the time to keep the digital hounds at bay.

The internet is just unrelenting in its attempts to mark us and remember everything we have ever typed.  Of course the flip side is then the various ad agencies then use this information to push their marketing directly to us but only after it has been tailored to our history.

I don’t mind the marketing, well perhaps I do a bit, but big digital shouldn’t need to know about anyone’s interest in fluffy bunny slippers or anything else.

The good news is that the Electronic Frontier Foundation apparently feels about the same as they have created a addin that helps protect against non-consensual Web tracking.  Not only that they have created a web page that can perform a test to see how protected your browser is.

 https://panopticlick.eff.org/

Simply press the big “test me” button to find out how anonymous you really are.

You can see the output when I tested my browser, not so great.  The results were much better the second time after installing privacy badger.

I don’t know if this is available for internet explorer but this is available for both Chrome and Firefox.

I can only recommend installing this on any computers that you wish to try and keep a small amount of privacy.

Posted in security | Tagged , | Comments Off on enhancing the privacy we still have