
When the children were really young they had a very tiny little nightlight. It didn’t really give off all that much light but it was enough to keep the boys happy. But nothing lasts forever and as it turns out they were growing up and that cute little light was for little kids.
This gave the perfect opportunity for me to get a large strip of RGB leds that could be mounted onto the end of bunk bed which would provide both the light and also provide a certain level of coolness.
Getting the setup was trivial as it is possible to purchase a led strip along with a power supply and remote control for switching the colors.
Version 1.0

The setup was really simple as the led strip has a self adhesive tape on the back.
Pros
- Can be installed within minutes
Cons
- A bit bright
- Gravity
It was super easy to mount the leds but gravity kept taking its toll. They wouldn’t stay stuck on the board and in the end I had to get some tacks to help keep the led strip in place. I could have used glue but considering that they were mounted vertically it would have been a pain to glue them on.
More than that, I was uncertain how long this solution would last and if permanent attachment to the wood was a good idea.
Version 2.0
The boys really did like the led solution but every time I came into their room during the day I saw a led strips that were hanging on for dear life. Sure it worked but it didn’t look neat or professional.
In my mind the biggest problem with the existing solution was that it was attached to the bed. There isn’t a lot of space between the bed and the wall. If a problem were to actually occur with one of the led strips I would have to kneel in the corner between bed and wall to fix it.
The new plan was to create a small “light fixture” that could be mounted at the end of the bed. Because it is a light fixture I can take it to another room and work on it. Doing this does have an additional level of effort as I did have to cut the strip into pieces and then to solder them back together once they were mounted to the board.
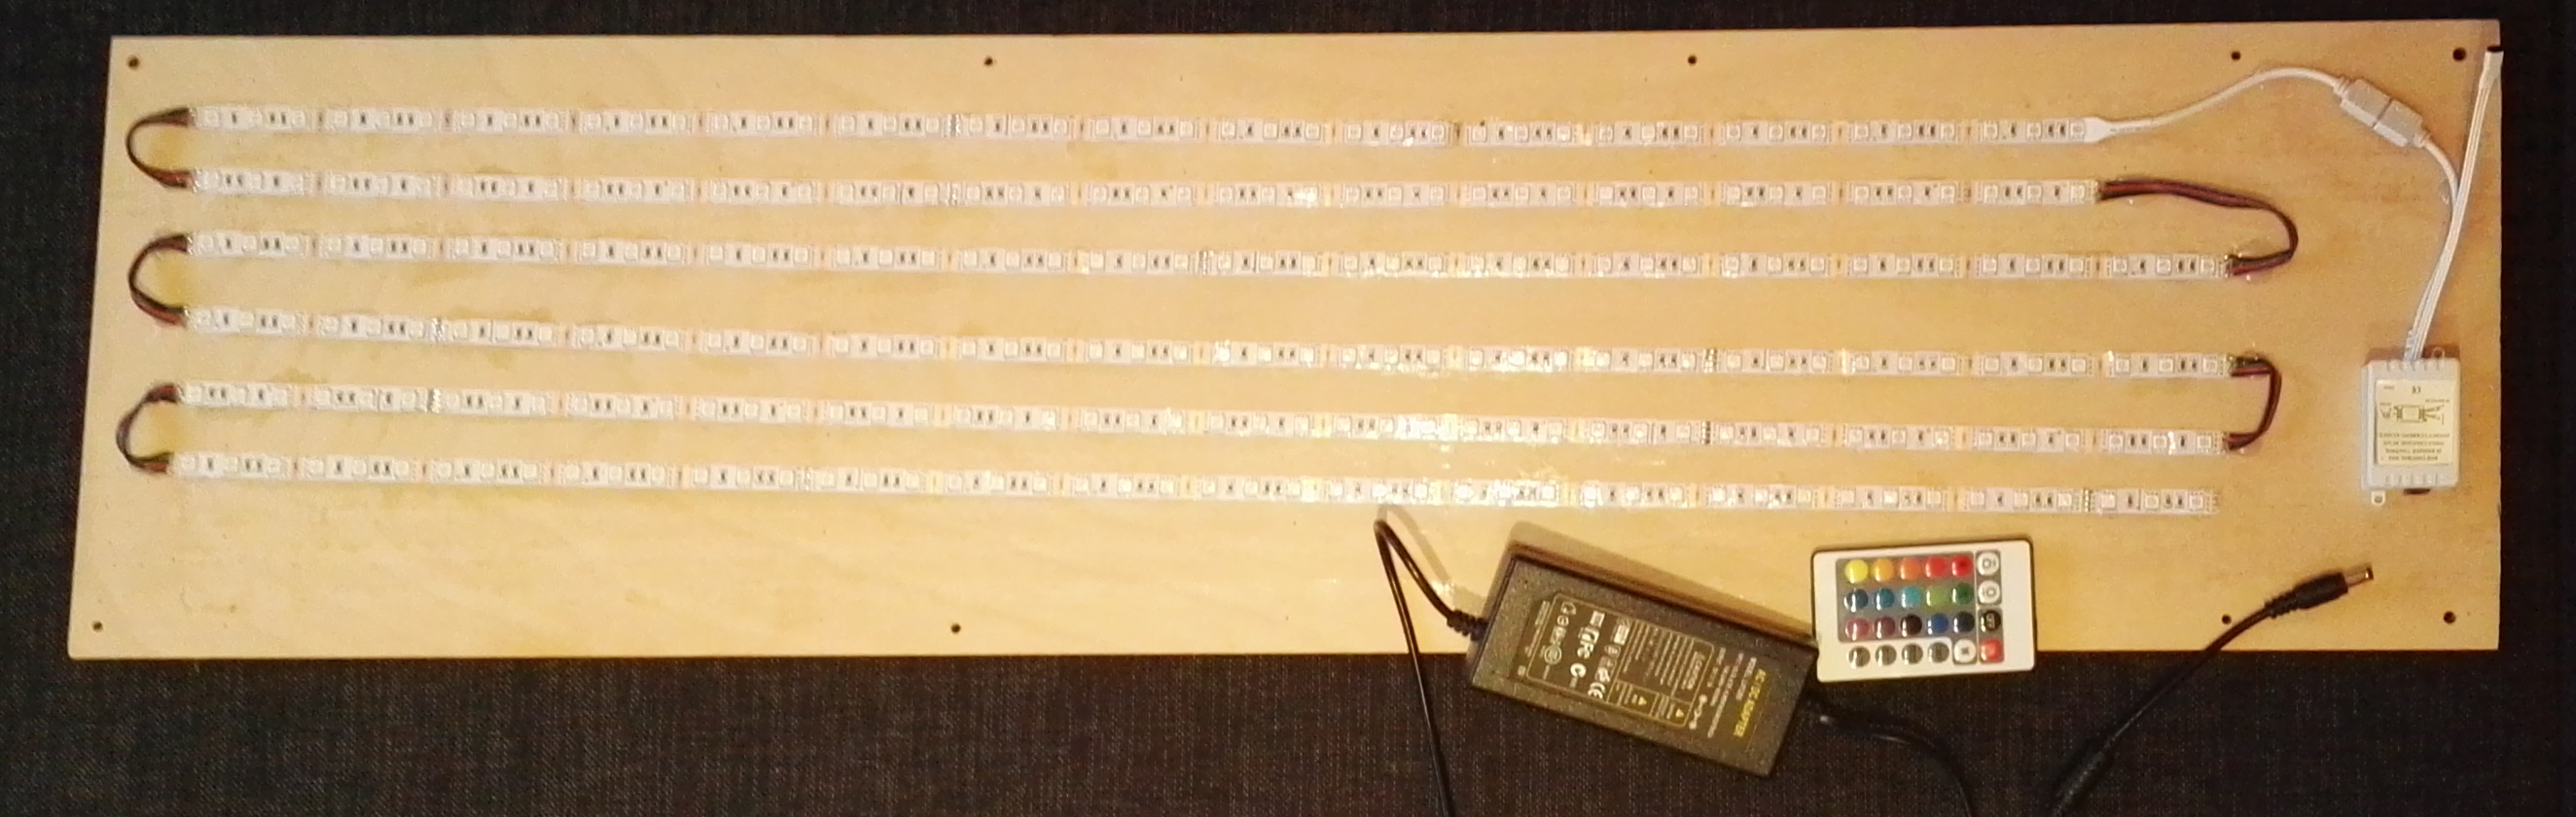
Led lighting version 2.0
The assembly wasn’t terribly challenging but perhaps my choice of wire for connecting the strips was less than optimal. I had picked up a four wire extension core for led strips. It was four wire extension cord that was red, green, blue and black. The wires used matched the led strip but because they were all joined together like a flat cable and thus working with it was somewhat awkward.
Pros
- Portable
- Organized
Cons
- Brighter than before
- Gravity
However, Gravity has not been rescinded just because I have chosen to take a slightly different approach for mounting the led strips. The adhesive tape still doesn’t hold well enough by itself and in the end I had to glue down the led strip.
The led solution is technically no brighter than before but they are now concentrated on a single board and they are now mounted lower on the bed across from a white wall. This is still a good solution but the lights are actually too bright for nighttime lighting.
It was about this time that I was feeling just lazy enough that I thought perhaps I could just purchase some sort of solution that would let me control the led strip over my network. I was hoping that this solution would allow me to programmatically control the leds both colors and power via WiFi.
Version 3.0
I couldn’t find exactly the type of control that I was looking for. The question came up in my mind was just how difficult would it be to roll my own solution.
If you are a an electrical engineer coming up with custom electronics to control devices has most likely never been a problem. For the rest of us, the mysteries of the electron and the catalog of parts that might be required can create a bit of a hurdle.
The good news is that 2016 is in the decade of the do-it-yourselfer. There is an amazing amount of small general purposes electronics boards that can be quickly and easily connected together.
The electronic boards that are available range from micro-controller boards such as the Arduino but range up to full computers sporting multiple cores such as the Raspberry pi. Both of these devices provide pins that can be used to connect them to other external devices or chips to allow for novel expansion.
I am not a huge Arduino historian but it seems that it was previously possible to get a small addon board to allow it to connect via WiFi. This was probably an incredible platform but it appears to have been supplanted with the ESP8266 board. The ESP8266 board, or one of the numerous compatible boards, is essentially an Arduino with the WiFi chip on the same board. This allows you to connect directly to the microcontroller via WiFi and then control whatever is connected to the I/O pins.
My solution is to use this new ESP8266 and a relay to control the led strip. I purchased small board with two relays. A relay is just switch that can be used to control on and off electronically.
The change to the existing “lighting fixture” is to create a control board which routes the power through the relays which are controlled by the ESP8266. I decided that the lowest overhead way to communicate with the ESP8266 was to send it commands via UDP packets.

Control board
The nice thing about this solution was that I could add the electronics to a small piece of wood and add it on as a controller board without having to completely redo the “lighting fixture”.
In order to add the control board to the “light fixture” I had to make two small changes to the original wiring. The first change is to feed the ground of the main power through the first relay. This makes it possible to cut off all the power to the leds, which is essentially an off switch. The second change is to feel the ground wire to the relay which allows me to enable or disable the last four led strips.
This allows two strips to be lit and create some lighting for nighttime while still having the opportunity to turn on all the led strips.
Note: this just controls the power, the actual color selection or effects are still done via the remote control.

Led lighting version 3.0
Pros
- Lights can be turned on and off via WiFi
- Thermometer
Cons
- Two power cords
- Unable to control leds colors via WiFi
I will explain all of the construction and setup in the next part, Evolution of LED Lighting – hardware and tools.
